

Common Placket Sewing Problems and How to Prevent Them
A shirt can have the right fabric, an attractive silhouette, and carefully selected buttons, yet still look poorly finished when its front placket twists or the stitching gathers the fabric. These defects are particularly noticeable because plackets often sit along some of the most visible areas of a garment.
The problem becomes more complicated in production. A placket that looks acceptable immediately after sewing may distort during pressing or washing. A button-front blouse may appear straight on a table but develop gaps when worn. A sleeve placket may look neatly pointed yet begin to tear near the top of its opening after repeated use.
These problems do not necessarily share the same cause. Some originate in pattern development, others in fabric handling, sewing-machine settings, reinforcement, or the interaction between garment fit and fastening placement.
For fashion brands and garment manufacturers, effective troubleshooting means identifying the actual cause before changing the construction. Adjusting thread tension will not correct an inaccurate pattern, and adding interfacing will not solve every problem caused by poor fabric feeding.
Understanding the relationship between these defects and their underlying causes helps product-development and production teams achieve more reliable results.
Quick Answer: What Are the Most Common Placket Sewing Problems?
Common placket sewing problems include uneven or twisted plackets, puckered stitching, misaligned buttons and buttonholes, gaping closures, bulky fabric folds, weak sleeve openings, and distortion caused by unsuitable interfacing or pressing. These defects can affect the garment's appearance, fastening performance, comfort, and durability.
The main causes typically involve inaccurate pattern dimensions, inconsistent fabric feeding, improper stitching conditions, insufficient or excessive reinforcement, incorrect folding, and poor coordination between the placket and garment fit.
Prevention begins before sewing. Pattern makers need to establish accurate opening dimensions, fabric extensions, and alignment references. Sewing teams must use appropriate needles, threads, machine settings, and handling methods. Quality-control teams should inspect the opening both fastened and unfastened, including its performance during fitting and after appropriate care testing.
Not every visible irregularity comes from sewing-machine settings. A button placket that gaps across the chest may reflect insufficient garment ease, while a sleeve opening that tears near its endpoint may result from inaccurate clipping or inadequate reinforcement.
The most reliable approach is to diagnose the defect, verify its cause, and correct the relevant construction or production process.
Why Placket Sewing Defects Occur
Plackets combine several technical requirements within a relatively small garment area. Fabric layers must align, folds must maintain their dimensions, and stitching must hold the opening securely without distorting the surrounding material.
When fasteners are involved, the construction must also accommodate repeated opening and closing. A shirt-front placket may need to support several buttons while remaining straight through the neckline, chest, waist, and hem. A sleeve placket must finish the slit without allowing the opening endpoint to weaken.
Because these functions are interconnected, a small error can become visible across a larger section of the garment.
Pattern and Construction Errors
Placket defects sometimes begin with incorrect cutting patterns or insufficiently defined construction instructions.
For example, a folded shirt placket depends on the relationship between its original fabric extension, fold allowances, and finished width. If the extension is calculated incorrectly, accurate sewing alone cannot produce the intended dimensions.
Similar problems occur when the center-front reference is misplaced, the overlap is too narrow, or a sleeve-placket component is positioned incorrectly.
These issues are best identified during pattern verification and sample development, before the same construction is repeated in bulk production.
Fabric and Material Behavior
Fabric properties influence how easily a placket can be folded, stitched, and pressed.
A stable cotton poplin may support sharply defined folds, while a lightweight viscose fabric can move or stretch during handling. A dense woven material may resist accommodating the sewing thread without local distortion, and a thick fabric may create excessive bulk where several layers overlap.
Materials can also respond differently to washing, steam, or other finishing processes.
A placket made with incompatible interfacing may distort even when the stitching itself is correct. This is why material selection and construction should be evaluated together rather than independently.
Sewing-Machine and Handling Conditions
Thread tension, needle selection, stitch density, presser-foot pressure, and fabric feeding can all influence the finished placket.
The technical bulletin Eliminating Seam Puckering by Coats identifies several distinct causes of seam puckering, including excessive thread tension, structural yarn displacement, uneven feeding, and dimensional changes in fabric or thread.
This distinction is particularly relevant to placket construction. A gathered stitching line may look like one problem, but different causes require different corrections.
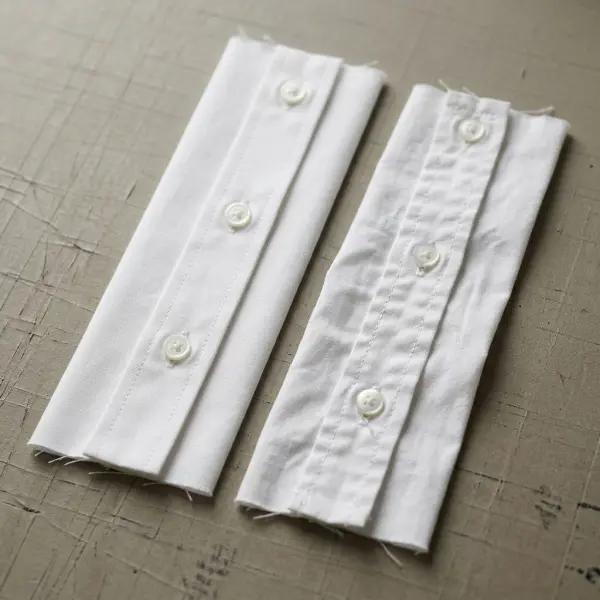
Common Placket Defects: Symptoms, Causes, and Prevention
Before examining individual defects, it helps to separate what can be seen on the garment from what may have caused it.
|
Visible Problem |
Possible Underlying Cause |
Primary Prevention Approach |
|
Puckered placket stitching |
Excessive thread tension, uneven feeding, fabric structure, or unsuitable stitch settings |
Test the fabric and optimize sewing conditions |
|
Crooked or twisted placket |
Inaccurate cutting, folding, alignment, or fabric distortion |
Verify grainline, pattern measurements, and pressing |
|
Gaping between buttons |
Insufficient garment ease, unsuitable button placement, or inadequate overlap |
Review fit, closure spacing, and pattern design |
|
Misaligned buttons |
Incorrect marking or button/buttonhole positioning |
Use approved placement references and functional checks |
|
Weak sleeve opening |
Inaccurate clipping, insufficient reinforcement, or unsecured slit endpoint |
Control cutting and reinforce according to the construction |
|
Bulky placket |
Excessive fabric layers, thick interfacing, or poorly managed seam allowances |
Evaluate fold arrangement and material thickness |
|
Bubbling or stiffness |
Incompatible interfacing or unsuitable fusing conditions |
Conduct fabric-and-interfacing compatibility tests |
|
Distortion after washing |
Differential shrinkage or unstable material combinations |
Test finished samples under intended care conditions |
These are diagnostic starting points, not definitive conclusions. The same visual symptom can result from several causes, and more than one cause may be present simultaneously.
For production teams, the first step should be a controlled inspection of the affected garment and its construction history.

Problem 1: Puckering Along the Placket Stitching
Puckering is one of the most recognizable sewing defects. It appears as unwanted ripples, wrinkles, or gathers along a stitched line.
On a shirt placket, puckering can interrupt an otherwise smooth vertical surface. Because the opening is typically close to the garment's center front, even relatively small irregularities may be noticeable.
Why Does Placket Puckering Happen?
Puckering can occur when the sewing thread, fabric, and machine feeding system do not behave compatibly during stitching.
Excessive thread tension may pull the fabric together as the thread relaxes after sewing. Uneven feeding can produce a different problem: one fabric layer travels through the machine at a different rate from another, and the resulting length mismatch becomes trapped in the seam.
Tightly woven fabrics may also experience structural displacement when the needle and thread pass through the material. In such cases, reducing thread tension alone may not resolve the defect.
Fabric instability introduces another possibility. When the placket fabric, reinforcement, or sewing thread changes dimensions differently after care, puckering may become visible only later.
How to Prevent Puckered Plackets
Prevention should begin with a sewing trial using the actual fabric, thread, needle, interfacing, and intended placket structure.
The operator should check that thread tension is balanced and not higher than necessary for a secure stitch. Presser-foot pressure and feeding performance must also be appropriate for the material.
Where structural displacement is suspected, testing a finer needle or thread and an appropriate stitch density may improve the result. These adjustments should be made without compromising seam strength or the required appearance.
The Coats apparel sewing FAQ also identifies needle condition, feeding components, fabric stretching, and stabilizers as relevant troubleshooting factors.
For a garment factory, the practical lesson is to avoid changing several machine settings at once without recording the results. Controlled trials make it easier to identify which adjustment actually improves the placket.
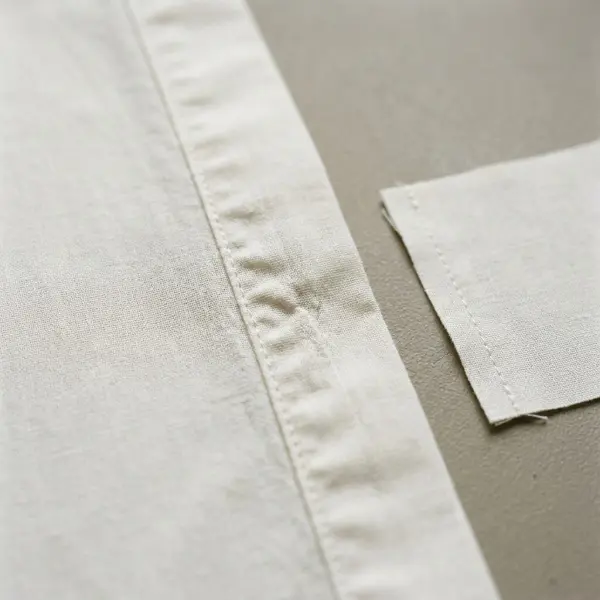
Problem 2: Crooked, Twisted, or Uneven Placket Edges
A placket may look crooked when its finished width changes, its edges fail to run parallel, or the entire opening twists away from its intended alignment.
This defect can be particularly visible on plain fabrics, where there is little surface pattern to distract from an irregular front line.
On striped or checked fabrics, incorrect alignment may also become apparent because the placket interrupts the intended pattern arrangement.
Why Plackets Lose Their Straightness
Several causes are possible.
The pattern may have been cut off-grain, the fabric extension may have been measured incorrectly, or the fold lines may have been formed inconsistently. Uneven pressing and fabric stretching during sewing can introduce further distortion.
For an applied placket, poor control of the separate band can create additional problems if the band and garment front are fed through the machine at different rates.
A twisted placket does not automatically indicate that the sewing operator worked inaccurately. If the original pattern or cutting direction is wrong, the defect may persist even with careful sewing.
Preventing Uneven Width and Twisting
The finished placket width should be defined in the pattern and technical specification, together with the necessary fold or seam allowances.
Before stitching, the fabric should be checked against the intended grainline and construction markings. Consistent pressing can then help establish the fold positions without stretching the material.
During sewing, operators should avoid pulling the placket to force it through the machine. Suitable guides or folders may help maintain consistent dimensions where they are compatible with the fabric and production process.
A useful inspection involves laying the garment flat, checking both front edges, and fastening the closure to confirm that the intended center-front alignment is maintained.
Problem 3: Gaping Between Buttons on Shirts and Dresses
Button gaping occurs when the garment opens unintentionally between fastening points.
It is particularly noticeable across the bust, chest, waist, or other areas where the garment experiences tension during wear.
Although gaping is often attributed to poor placket sewing, its underlying cause may be related to garment fit rather than construction workmanship.
Is Gaping a Fit Problem or a Placket Problem?
Both are possible, and the distinction matters.
A shirt that is too tight across the chest may pull its front edges apart even when the placket is correctly sewn. Insufficient overlap, unsuitable button spacing, or inaccurate fastening positions can contribute to the same symptom.
A garment may also appear properly closed when lying flat but gap when the wearer sits, reaches forward, or moves.
In an article on button placement for shirts and blouses, Threads contributing editor Louise Cutting explains that button positioning around the bust can influence whether a garment gaps, even when the overall fit appears acceptable.
How to Prevent Button Gaping
The first step is to evaluate garment ease and fit on an appropriate fit model.
If the front experiences excessive tension, the pattern may require additional room or a different shaping adjustment. Moving buttons without correcting the fit may only disguise part of the problem.
If the garment fits adequately, the team can review button position, fastening intervals, overlap width, and closure behavior.
Positioning a button near a critical tension area may help reduce unwanted opening, but the exact arrangement depends on garment size, styling, and construction.
For dress and blouse development, fit testing should include realistic movement rather than relying only on a static fitting.

Problem 4: Misaligned Buttons and Buttonholes
A placket may be accurately folded and stitched yet still produce a visibly uneven front closure when its buttons and buttonholes are incorrectly positioned.
The problem may appear as a shifting hem, diagonal pulling between fasteners, or front panels that no longer align properly when closed.
How Fastener Positioning Creates Alignment Problems
Buttonholes and buttons must correspond to the approved closure reference.
For a conventional button-front design, this usually involves coordinating the button and buttonhole positions with the garment's center-front line and intended overlap.
If the marks on the two fronts are transferred inaccurately, fastening the garment may pull one panel upward or sideways.
Buttonhole orientation and length can also affect how the button sits within the opening. A buttonhole that is poorly sized for its button may create fastening difficulties, while an unsuitable position may allow the garment fronts to shift.
The Threads tutorial on making blouse buttonholes demonstrates how measuring, marking, buttonhole construction, and subsequent button attachment need to be coordinated.
Preventing Closure Misalignment
Button and buttonhole placement should be established from an approved pattern or sample rather than estimated by eye.
Before buttonholes are cut, their position, orientation, and length should be checked against the intended button size and fastening arrangement.
The first completed sample should be fastened fully and examined for alignment at the collar, body, and hem. Critical placement points may require adjustment after fitting.
Factories using automated buttonhole equipment should also verify that the programmed positions correspond to the correct garment size and construction.
A repeated positioning error can otherwise affect an entire production batch even when the machine produces technically consistent buttonholes.
Problem 5: Weak or Tearing Sleeve Placket Openings
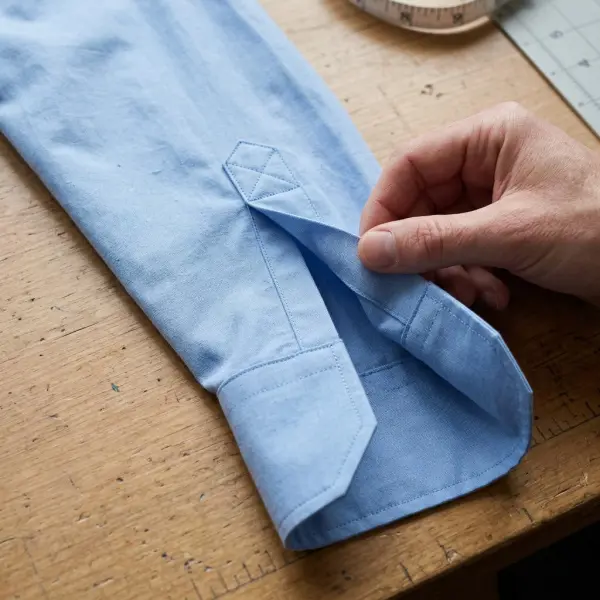
Sleeve plackets require particular attention because their openings often include a slit that terminates within the sleeve fabric.
The top of this opening is an area where stress may become concentrated during dressing, cuff opening, and repeated wear.
A finished sleeve placket can look attractive while concealing a weakly secured slit endpoint.
Why Sleeve Plackets Tear Near the Opening Point
In tower and continuous bound sleeve constructions, the opening is generally prepared through controlled cutting and stitching.
If the slit is cut too far into the surrounding fabric or beyond the prescribed reinforcement, the remaining material may be weakened.
Inadequate stitching at the upper opening can allow the slit edges to separate or the narrow fabric section to distort under tension.
Problems can also occur when the placket is assembled with excessive bulk or the opening is too short for comfortable use. Repeated pulling may then place additional stress on an already vulnerable area.
The Threads guide to professional sleeve plackets demonstrates the importance of correctly marking the opening, stitching around the slit, and securing the small fabric section near the upper end.
How to Prevent Damage to Sleeve Openings
Sleeve placket construction should follow a precisely defined pattern and cutting sequence.
The opening should be marked before cutting, and any reinforcement stitching should be completed in the order required by the construction method.
When clipping corners or creating a V-shaped opening, operators must avoid cutting through the reinforcement stitches. The remaining fabric should be properly captured within the finished placket.
Appropriate reinforcement, secure stitching, and controlled pressing help protect the endpoint, but they cannot compensate for an opening that is dimensionally inadequate.
Before production approval, the sleeve should be tested with its finished cuff to confirm that the hand can pass through comfortably.
Problem 6: Bulky, Stiff, or Uneven Placket Folds
Excessive thickness can make a placket appear raised, rigid, or poorly integrated into the surrounding garment.
This is especially relevant when the construction uses multiple folds or when a placket intersects with collars, cuffs, waist seams, or hems.
Hidden button plackets can be particularly sensitive because the fabric used to conceal the fasteners adds another structural layer.
What Creates Excessive Placket Bulk?
Bulk can develop when several layers of thick material overlap within a narrow finished width.
Additional interfacing, untrimmed seam allowances, and bulky fastening components may contribute to the problem.
In a lightweight blouse, the contrast between a stiff placket and a fluid garment body can be just as undesirable as visible fabric thickness. The opening may hold an unnaturally rigid shape while the surrounding material drapes softly.
The issue is therefore not limited to heavy fabrics. It depends on the relationship between the garment material, placket geometry, and reinforcement.
Reducing Bulk Without Weakening the Construction
Bulk reduction should begin with reviewing the approved construction method and its material requirements.
Depending on the design, grading seam allowances, selecting a more appropriate interfacing, adjusting fold geometry, or changing the method of construction may help.
However, seam allowances and reinforcement should not be removed indiscriminately. Some layers provide necessary support for fasteners or protect the opening from strain.
Product-development teams should test modifications on a full construction sample, including adjacent seams and fasteners.
A thinner placket is not automatically a better placket if the reduced construction cannot withstand its intended use.
Problem 7: Bubbling, Wrinkling, or Distortion From Interfacing
Interfacing is frequently used to stabilize areas that require additional structure, including some plackets and buttonhole sections.
When the chosen interfacing is unsuitable or applied incorrectly, the finished surface may develop bubbles, unwanted stiffness, or irregular texture.
These defects can be particularly noticeable on plain, smooth fabrics.
Why Fusible Interfacing Can Create Problems
Fusible interfacing depends on a suitable relationship between its adhesive, the outer fabric, and the application conditions.
An incompatible material combination may produce unwanted changes in handfeel, surface appearance, or dimensional behavior.
Inappropriate heat, pressure, or application time can also affect the bond or damage sensitive fabrics.
The requirements are product-specific. A method that works for one fusible interfacing should not automatically be used for another.
The manufacturer Pellon emphasizes fabric compatibility testing in its lightweight fusible interfacing instructions, including allowing the material to cool and checking the bond after application.
How to Prevent Interfacing-Related Defects
The correct approach begins with testing the actual fabric and interfacing together.
The team should follow the interfacing supplier's specified application conditions and inspect the resulting sample for adhesion, appearance, drape, and stability.
For production using a fusing press, process conditions should be verified and monitored rather than assumed to remain consistent.
Where appropriate, a sew-in interfacing or a different stabilization method may be evaluated if fusible materials are unsuitable.
The placket should also be examined after the intended care process. An acceptable appearance immediately after fusing does not guarantee that the construction will behave identically after laundering.
Problem 8: Placket Distortion After Washing or Finishing
Some placket defects become visible only after the garment has been washed, dried, steam-finished, or otherwise processed.
A shirt front that was straight during final sewing inspection may develop ripples or a changed appearance after care.
This can happen when the fabric, interfacing, and sewing thread respond differently to moisture, heat, or mechanical treatment.
Differential Shrinkage and Material Compatibility
A placket includes multiple fabric layers that may not behave exactly like the surrounding garment.
If one component shrinks more than another, the combined structure can become distorted. The stitching may constrain movement along the opening, creating visible puckering.
Thread properties can also influence the result. As described in Coats' technical guidance, differences in dimensional behavior between textile components may contribute to puckering after washing or finishing.
This does not mean that a particular fiber or interfacing will always create problems. The risk depends on material composition, fabric construction, finishing, and care conditions.
Why Care Testing Matters
For fashion businesses, wash or care testing should form part of sample approval when the garment is intended for repeated cleaning.
The appropriate procedure depends on the product's care instructions and quality-testing requirements.
The finished placket should be examined for changes in width, straightness, stiffness, surface appearance, and fastening function.
Where problems occur, the team may need to review material compatibility, dimensional stability, sewing conditions, or the construction itself.
Pressing the garment back into shape may temporarily improve its appearance, but it does not necessarily resolve the underlying cause.
How to Diagnose Placket Problems Before Changing the Sewing Process
A practical troubleshooting system begins by separating the visible symptom from the operation that created it.
If a shirt placket looks wavy, for example, it is tempting to reduce thread tension immediately. Yet the problem may originate from uneven feeding or material instability. Changing tension without verification can create a new stitching defect while leaving the original problem unresolved.
A more disciplined diagnosis uses the garment's condition, production history, and sample comparisons.
Identify When the Defect First Appears
Timing provides useful clues.
If the placket is already crooked after cutting and initial folding, the problem may involve pattern dimensions, fabric grain, or preparation.
If it becomes distorted only during stitching, machine feeding, thread tension, or handling may be contributing factors.
If the defect appears during pressing or washing, the investigation should consider heat sensitivity, interfacing compatibility, and dimensional changes.
These observations do not establish the cause on their own, but they help narrow the investigation.
Compare Defective and Approved Samples
The affected garment should be compared with the approved construction sample using the same inspection conditions.
Relevant comparisons include finished width, fold accuracy, button placement, fabric behavior, stitch appearance, and the relationship between the placket and adjacent garment sections.
If the defect occurs only in one fabric color or material batch, the team should investigate whether differences in material characteristics or finishing have influenced sewing performance.
If it appears repeatedly across all fabrics, the pattern, equipment setup, or work instructions may deserve greater attention.
Test One Correction at a Time
When possible, potential corrections should be evaluated through controlled sewing trials.
For puckering, this might mean checking thread tension and stitch balance before changing needle size or feed conditions. For uneven placket width, the investigation may begin with pattern and fold measurements.
For sleeve opening defects, the team should inspect cutting accuracy and reinforcement before changing the entire placket design.
The result of each trial should be documented so that an effective correction can be transferred into the approved production process.
Preventing Placket Defects During Apparel Product Development
Placket quality is easier to control when prevention is built into development rather than treated as a final inspection responsibility.
A well-defined construction reduces ambiguity between the designer, pattern maker, sample room, and production team.
Define the Placket in the Tech Pack
The technical specification should describe the placket's actual construction rather than rely solely on general terms such as "standard button placket."
The document should define location, finished dimensions, overlap arrangement, construction method, reinforcement, stitching details, and fastening placement.
These requirements need to correspond with the approved pattern and garment sample.
For brands comparing alternative constructions, button plackets, sleeve plackets, and hidden plackets provides additional context on their distinct functional and manufacturing requirements.
Validate the Complete Material Combination
Testing should use the selected garment fabric, thread, interfacing, fasteners, and finishing method.
Approving a placket in a substitute fabric may not establish that the construction will perform equally well in the intended production material.
Particular attention should be given when the collection includes fabrics with substantially different thickness, drape, stretch, or dimensional stability.
The goal is to understand the construction's actual behavior rather than assume that a previously successful sewing method will produce identical results.
Establish Repeatable Sewing Operations
A production-ready placket requires clear work instructions and appropriate equipment settings.
Operators should know the intended fold arrangement, stitching sequence, reinforcement requirements, and inspection points.
Where folders, guides, or automated equipment are used, the setup should be checked against the approved dimensions.
Production consistency depends on maintaining the selected method across operators and batches, while allowing documented adjustments when fabric behavior requires them.
Placket Quality Control: What Should Inspectors Check?
Placket inspection should evaluate functional performance as well as visual appearance.
A perfectly straight placket can still fail if its buttonholes are poorly positioned. Conversely, a correctly functioning closure may be unacceptable if visible stitching is inconsistent with the brand's quality standard.
The inspection procedure should therefore combine dimensional verification, construction checks, and garment fitting where relevant.
|
Inspection Area |
What to Verify |
Why It Matters |
|
Finished placket width |
Matches the approved specification within agreed tolerance |
Controls appearance and construction consistency |
|
Front alignment |
Garment panels meet correctly when fastened |
Prevents visible shifting or imbalance |
|
Stitching quality |
Consistent stitches without unacceptable puckering or skipped stitches |
Supports appearance and seam integrity |
|
Button and buttonhole placement |
Correct size, location, orientation, and function |
Supports reliable fastening |
|
Overlap and underlap |
Correct coverage and arrangement |
Helps maintain closure performance |
|
Sleeve opening endpoint |
Securely finished and free from visible cutting damage |
Reduces the risk of opening failure |
|
Interfacing application |
Stable, suitable bond and acceptable surface appearance |
Helps maintain intended structure |
|
Functional fit |
Comfortable opening, closing, and movement |
Identifies problems not visible on a flat garment |
|
Care performance |
Acceptable shape and fastening function after relevant care testing |
Evaluates in-use stability |
Acceptance criteria should be based on approved samples, appropriate testing requirements, and the garment's intended market.
There is no single universal placket width, allowable pucker level, or stitching tolerance that applies to every product.
A structured formal shirt may require tighter visual alignment than a deliberately relaxed casual garment, but both should satisfy their documented construction and functional requirements.

How Placket Problems Affect Manufacturing Cost and Product Quality
The commercial impact of a placket defect depends on its severity, how frequently it occurs, and when it is discovered.
A minor irregularity identified during sample development may require an adjustment to the pattern or sewing process. The same issue discovered across a finished production batch may involve additional inspection, rework, or replacement.
Some placket defects are also difficult to repair without leaving evidence.
For example, correcting incorrectly positioned buttonholes can be challenging because the fabric has already been cut and stitched. Similarly, damage near a sleeve slit may not be recoverable without additional reinforcement or component replacement.
This makes early defect detection particularly valuable.
Rework and Production Disruption
Repairing plackets can involve removing stitches, re-pressing components, adjusting buttons, or replacing parts of the garment.
The feasibility of repair depends on the fabric and the defect. Unpicking stitches from delicate materials may leave visible needle marks or damage the fabric surface.
Repeated correction can also disrupt production flow when garments must return to earlier operations.
Manufacturers should therefore consider whether a defect can be safely repaired, whether the repair will satisfy the approved quality standard, or whether the affected component needs replacement.
Product Consistency and Customer Expectations
Customers may not know the technical language of placket construction, but they can recognize a shirt front that twists or a blouse that gaps unexpectedly.
These defects can affect perceived quality, comfort, and confidence in the garment.
For brands built around consistent sizing or clean finishing, recurring placket problems may undermine the intended product experience.
However, the relationship between a specific defect and commercial outcomes varies by product, customer expectations, and severity. Claims about return rates or financial losses should be supported by the brand's own quality and customer-service data rather than assumed.
Common Mistakes in Placket Troubleshooting
Troubleshooting can become inefficient when teams respond to symptoms without investigating their causes.
Several recurring assumptions are especially worth avoiding.
Increasing Interfacing Whenever the Placket Looks Unstable
Additional interfacing may improve stability in some constructions, but it can also introduce stiffness, bulk, or surface distortion.
If a placket twists because the fabric has been cut off-grain, heavier interfacing will not necessarily solve the underlying problem.
The correct approach is to establish whether the instability originates from the fabric, pattern, reinforcement, or sewing process before selecting a treatment.
Correcting Gaping Only by Adding More Buttons
Additional fastening points may help some garments, but they cannot reliably compensate for insufficient body ease or an unsuitable fit.
Adding buttons to an overly tight blouse may simply redistribute the tension along the front.
The garment should be evaluated on the wearer, with attention to the body area where the opening occurs.
Closure adjustments should be made only after the fit and overlap have been assessed.
Using the Same Machine Settings for Different Fabrics
A sewing setup that produces a smooth placket on stable cotton may create puckering on a dense synthetic fabric or a lightweight, slippery material.
Changing fabric without reassessing needle selection, thread, feeding, and reinforcement can introduce avoidable defects.
Manufacturers should qualify sewing conditions for materially different fabrics and maintain documented settings where useful.
The appropriate setup should be determined through actual stitching trials rather than by assuming that a standard setting is universally suitable.
Relying on Final Pressing to Conceal Construction Errors
Pressing can improve the appearance of a correctly constructed placket by establishing folds and controlling seam allowances.
It cannot reliably correct incorrect cutting dimensions, unsuitable button positioning, or damaged opening endpoints.
Some irregularities may temporarily look less noticeable after pressing and return during wear or washing.
The better approach is to correct the relevant construction process before the defect becomes embedded in the finished garment.
What Fashion Brands Should Verify Before Bulk Production
Before releasing a garment for manufacturing, brands should confirm that the approved placket construction can be reproduced with the intended fabric, equipment, and production processes.
The approval should include more than a photograph of the finished sample.
The product-development team should examine the garment in its closed and open positions, assess fit where appropriate, and confirm that the placket remains compatible with the surrounding neckline, collar, cuff, or hem construction.
A practical preproduction review should cover:
- Pattern accuracy: Confirm the intended opening position, finished dimensions, fold allowances, and grainline references.
- Material compatibility: Evaluate the actual fabric, interfacing, thread, and fastening combination.
- Sewing performance: Inspect stitches, folds, feeding behavior, and reinforcement under the approved production method.
- Functional testing: Confirm that the opening provides adequate access and fastens without unacceptable tension.
- Care evaluation: Inspect the finished construction after the applicable cleaning or finishing procedures.
- Production documentation: Maintain an approved sample, technical drawings, and agreed inspection criteria.
These checks are especially useful when a brand develops several garments from a common base pattern.
For example, a woven shirt may be offered in cotton poplin, a viscose blend, and a thicker casual fabric. Sharing the same visual placket design does not mean that all three versions will require identical reinforcement or handling.
The construction should be validated for each materially different variation.
Important Technical Caveats
Placket defects should not be diagnosed from appearance alone.
Puckering can result from different combinations of machine conditions, fabric structure, and material instability. Gaping can reflect fit, fastening placement, overlap design, or a combination of these factors.
A damaged sleeve opening may require reinforcement, but its repairability depends on how much fabric has already been cut or weakened.
Li





Comments 0
Leave a CommentSend Comment
Anda harus Login terlebih dahulu untuk dapat memberikan komentar.