

Fabric Cutting Process Explained for Garment Production
The fabric cutting process converts approved garment patterns and fabric rolls into accurate, traceable components that can be assembled by the sewing line. It is not simply the act of moving a blade through cloth. A production cutting room must translate size ratios, fabric characteristics, marker plans, quality requirements, and order quantities into complete bundles without mixing shades, sizes, or garment parts.
Quick Answer
Fabric cutting in garment production is a controlled pre-sewing process that prepares fabric, arranges pattern pieces in a marker, spreads one or more fabric plies, cuts the required garment components, checks them, and organizes them into traceable bundles for sewing. A typical workflow includes production-order review, fabric inspection and relaxation where required, marker planning, spreading, cutting, cut-panel inspection, numbering, bundling, and issue to the next operation.
Accuracy matters because cutting errors are difficult to reverse. If a panel is distorted, a notch is misplaced, or shade lots are mixed, the problem may appear later as poor fit, sewing difficulty, mismatched color, rework, or an incomplete order. The correct method depends on the fabric, garment design, order volume, available equipment, and quality standard. A stable process is therefore more valuable than cutting speed alone: the cutting room must deliver the right parts, in the right quantity and sequence, with acceptable material utilization and safe working controls.
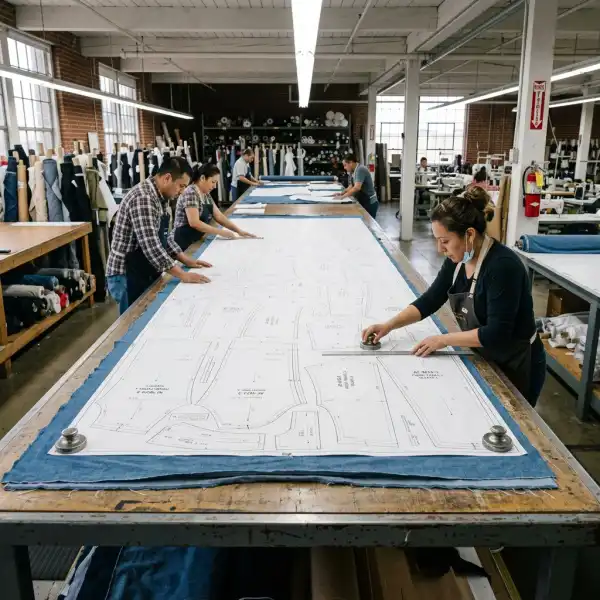
What Is the Fabric Cutting Process in Garment Manufacturing?
The fabric cutting process is a production-stage workflow that separates cloth into garment components according to approved patterns, sizes, quantities, grain directions, and construction information so those components can move into sewing or an intermediate operation such as fusing or embroidery. The output is not merely a stack of cut cloth. It is a controlled set of fronts, backs, sleeves, collars, waistbands, pockets, facings, and other parts that must remain identifiable and complete.
Cutting normally begins only after the style and production information are sufficiently approved. The cutting team needs usable patterns, a size breakdown, fabric details, quantity requirements, placement rules, and instructions for notches, drill marks, matching points, or cut parts that require reinforcement. If those inputs are inconsistent, a highly skilled cutter can still produce the wrong result with great precision.
The cutting room connects two operating realities. Fabric arrives with variations in usable width, shade, shrinkage behavior, defects, and lot identity; sewing lines expect accurate parts in an assembly-ready sequence. Cutting is where that variable material becomes order-specific work in progress.
The International Labour Organization identifies relaxing, spreading, laying, marking, form layout, and cutting as specialized activities within garment cutting work. This supports a more accurate view of the department as a coordinated production function rather than a single machine operation; see the ILO garment-sector skills strategy.
Why Does Cutting Matter So Much to Garment Quality and Cost?
Cutting establishes the physical accuracy of every fabric component entering assembly. Sewing can join panels, shape seams, and correct small handling differences, but it cannot reliably restore material removed from the wrong place. An inaccurate armhole, twisted grain direction, missing notch, or undersized seam allowance can affect fit and construction across an entire lay.
The financial effect is equally direct. Marker arrangement determines how much fabric area becomes usable garment parts, yet an efficient digital marker is not automatically economical in production. Actual width, pattern matching, damaged areas, end allowances, and replacement panels can change the result.
Three business outcomes converge in the cutting room:
- Product conformity: panels must match approved dimensions, grain direction, pattern placement, and construction marks.
- Material control: the department must use fabric responsibly while keeping roll, shade, and defect information traceable.
- Production continuity: sewing needs complete, correctly sequenced bundles at the required rate—not a large volume of mixed or incomplete pieces.
This is why cutting-room performance should never be judged by output speed in isolation. A department can cut many plies quickly and still create losses through recuts, bundle errors, downstream waiting, or poor fabric utilization.
How Does the Fabric Cutting Process Work Step by Step?
Factories organize the department differently, but the underlying control logic is similar. Each stage should either protect material, confirm production information, create accurate parts, or preserve their identity.
1. Review the production order and cutting instructions
The process starts with an authorized cutting order. The team reviews the style, color, fabric lot, quantity, size ratio, marker reference, planned lay, and special placement or handling instructions.
This review is where discrepancies should be stopped. A marker may contain five sizes while the order ratio has changed to six. The approved pattern may have been revised, but the cutting file may still be an earlier version. The fabric width used in marker planning may also differ from the usable width recorded during inspection. Releasing the lay before resolving such differences converts a document-control problem into physical waste.
For styles with strict measurement requirements, the approved patterns and tolerances should align with the product specification. The relationship between dimensions, tolerances, and production control is covered more fully in garment measurement and size specifications.

2. Inspect, identify, and prepare the fabric
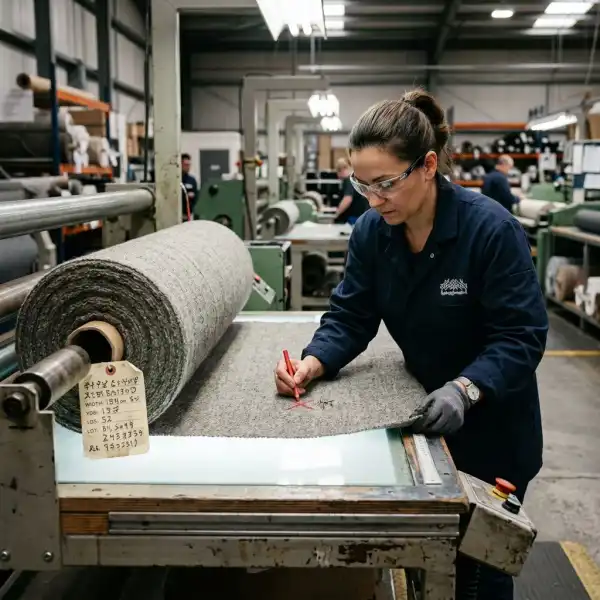
Before spreading, the factory confirms that the rolls match the order and records color, shade group, roll length, usable width, and visible defects. Inspection coverage varies, but the method and acceptance rules should be defined rather than improvised at the table.
Shade segregation is especially important because components cut from visually different lots may create a garment whose sleeves, body, or panels do not match under the same light. Rolls should retain their identity through cutting, and panels that must remain within the same shade group need an appropriate numbering and bundling system.
Some fabrics also require relaxation before cutting. Knitted and elastomeric materials, for example, may hold tension from rolling, transport, or finishing. Relaxation allows the material to settle under controlled conditions before it is spread and cut. The necessary method and time are material-specific; a universal relaxation period would be technically misleading. The supplier's technical information, internal trials, and shrinkage or dimensional-stability results should guide the procedure.
Conditioning for formal textile testing is a separate concept from production relaxation. ISO 139:2005, confirmed as current in 2025, defines standard atmospheres for conditioning and determining textile properties. A factory should not cite the standard as proof that its production fabric has been adequately relaxed unless its actual process and purpose correspond to the requirement.
3. Plan the marker and the lays
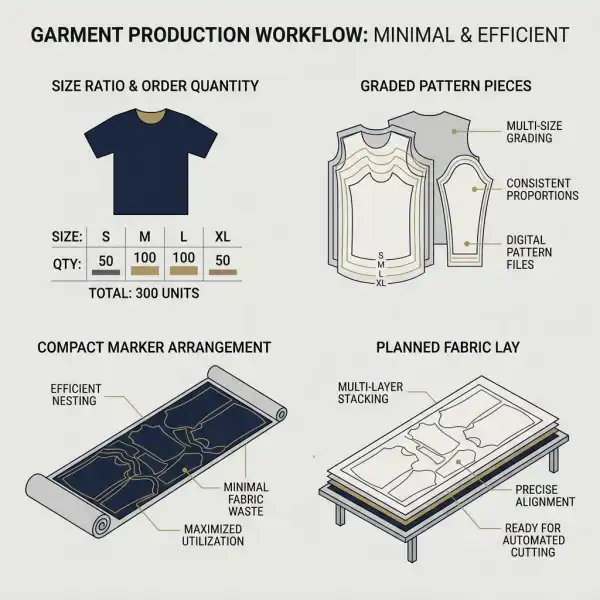
A marker arranges graded pattern pieces within a defined fabric width and length. It positions selected sizes while observing grain lines, pair requirements, nap, matching constraints, and placement rules. Whether manual or computer-assisted, its purpose is to convert the order ratio into a cuttable arrangement with controlled material use.
Marker efficiency is commonly expressed as the area occupied by pattern pieces divided by the total marker area, multiplied by 100. It is useful, but it is not a complete measure of actual fabric consumption. The figure does not automatically capture losses from roll ends, width variation, splice allowances, damaged areas, remnants, or recuts.
Lay planning connects the marker to the order. If a marker contains one garment in each of sizes S, M, and L, a lay of 40 plies would nominally produce 40 garments in each size. Real planning may require several markers and lays because order ratios, table length, roll availability, shade groups, fabric behavior, and cutter capacity impose constraints.
4. Spread the fabric under controlled tension and alignment
Spreading creates a lay by placing fabric plies on the cutting table at the required length, alignment, face orientation, and ply count. The material may be spread manually or with spreading equipment. In either case, the objective is not to pull the fabric perfectly tight. Excess tension can cause cut parts to contract after separation, while loose spreading can create folds, ripples, or inconsistent dimensions.
The spreading method must suit the material and marker. Face-up spreading may be needed where all components must follow the same direction. Face-to-face spreading can create paired plies for some non-directional materials. One-way fabrics, printed motifs, pile fabrics, and asymmetric pattern pieces require deliberate orientation; the fastest spreading path may not satisfy the garment specification.
Operators also manage roll changes, defects, and splices. The procedure should define whether an affected section is removed, overlapped, or marked for panel replacement. The decision must protect component completeness and traceability.
5. Secure the lay and cut the garment components
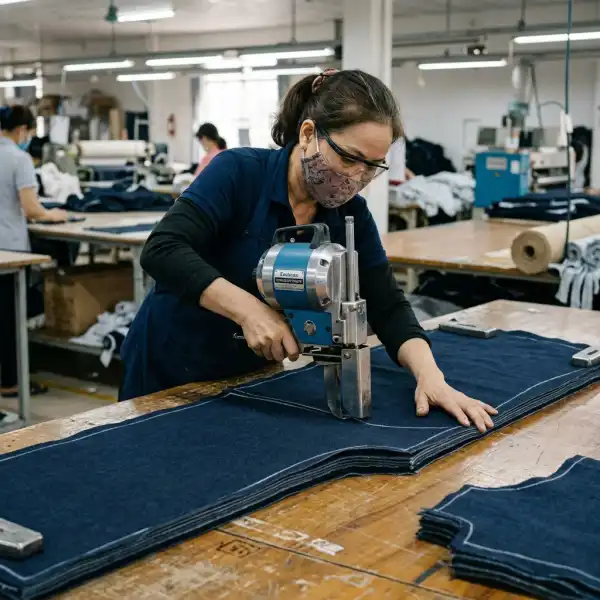
Once the lay is verified, the marker or digital cutting file guides the cutting operation. Depending on the factory, product, and volume, tools may include hand shears, straight-knife machines, round knives, band knives, die cutting, or computer-controlled cutting systems. A deeper evaluation of their capabilities, labor requirements, flexibility, and capital cost belongs in manual cutting versus automated cutting.
During cutting, the operator must preserve the intended shape through the full depth of the lay. Excessive lay height relative to the material and equipment can contribute to deflection or unequal components. Tight curves, small pieces, slippery surfaces, fused layers, and thick assemblies create different handling demands. Machine parameters, blade condition, vacuum hold-down where used, cutting speed, and operator technique all influence the result.
Notches and drill marks transfer assembly information from the pattern to the cut components. They may indicate matching points, pocket placement, dart position, pleats, or other construction references. These marks must be visible enough for production but must not extend beyond allowed limits or damage the finished garment area.
6. Inspect the cut components before bundling
Cutting inspection checks whether components are usable before defects travel into sewing. Controls may include top, middle, and bottom-ply comparisons; template checks; critical dimensions; edge quality; paired-part matching; notch and drill accuracy; and component completeness.
The sampling level depends on the factory's risk assessment and quality plan. For some operations, especially high-risk or unstable styles, inspection may be broader. The ILO's garment-sector improvement toolset recommends inspection of cut parts and panels for cutting and fabric defects before numbering and bundling; see the ILO Improvement Toolset in the Asian Garment Sector. Factories should still define their own acceptance criteria and escalation path rather than treating a general recommendation as a complete control plan.
When a defect is found, the response should preserve shade and lot integrity. Recuts from any available remnant may solve the quantity problem but create a visible color difference in the finished garment. A replacement-part procedure should therefore record the style, size, component, original bundle or shade group, reason for replacement, and source material.
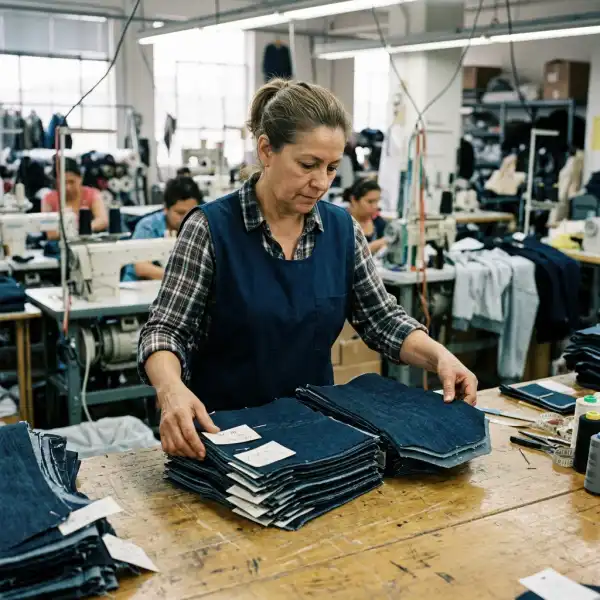
7. Number, bundle, and issue the parts to the next operation
Numbering keeps components from the same ply, garment set, shade group, or order together. Factories may use tickets, labels, barcodes, bundle cards, or digital tracking. Identification must survive handling without staining, damaging, or detaching from the component.
Bundling groups the required components in a controlled quantity and sequence for sewing, fusing, embroidery, printing, or another downstream step. A complete bundle may include the main cut parts plus a record of style, color, size, quantity, lay, bundle number, destination, and any operation-specific instruction.
This handover is a production control point. If the cutting room reports only how many plies were cut, management may miss missing pockets, swapped sizes, or bundles held for replacement parts. A useful issue record reports complete and accepted components, not theoretical garment quantities.
What Information Must Flow Into and Out of the Cutting Room?
A dependable cutting process is built on controlled information. Patterns, markers, order ratios, and fabric records must refer to the same style revision. Verbal updates are risky because the physical consequences may extend across hundreds of plies before anyone notices.
The minimum production package commonly includes:
- approved pattern or verified digital cut file, including seam allowances and construction marks;
- style, color, size range, order quantity, and size ratio;
- fabric code, usable width, lot or shade information, and special handling instructions;
- marker identification, direction and matching rules, and planned lay details;
- cut-component list, including pieces sent to fusing, printing, or embroidery;
- inspection criteria, tolerances, replacement procedure, and bundle identification rules.
The output record should reconcile planned quantities, actual plies, accepted panels, recuts, balance fabric, and bundles issued. This creates a trail for investigating a shortage or fit problem. It also makes consumption analysis more credible because the business can distinguish marker loss from end loss, damaged fabric, replacement panels, and unused remnants.
How Fabric Characteristics Change the Cutting Method
Two fabrics with the same nominal width may need very different cutting controls. The correct process follows material behavior and visual requirements rather than a one-size-fits-all standard operating procedure.
|
Fabric or design condition |
What changes in the cutting room |
Main risk to control |
|
Knit or elastomeric fabric |
Relaxation, tension control, lower or validated lay height, stable handling |
Panel contraction, stretching, or distortion |
|
Stripes, checks, or engineered prints |
Marker placement and matching allowance; sometimes single-ply or block-and-recut methods |
Misaligned motifs between joined panels |
|
Nap or pile fabric |
One-way marker and consistent face direction |
Visible color or surface-direction differences |
|
Slippery or delicate fabric |
Lay stabilization, careful spreading, suitable cutting parameters |
Ply movement, frayed edges, or inaccurate shapes |
|
Thick or compressed material |
Validated lay height, blade choice, speed, and pressure |
Blade deflection and unequal top-to-bottom panels |
|
Heat-sensitive synthetic |
Control blade heat and friction; validate equipment settings |
Melted or fused edges |
|
Fabric with shade variation |
Roll segregation, ply numbering, and controlled replacement parts |
Mismatched panels within one garment |
These are starting points, not fixed recipes. A production trial should confirm the method for the actual fabric and style. Finishing, fabric construction, weight, coatings, motif scale, and garment tolerances can change the outcome even within the same fiber category.
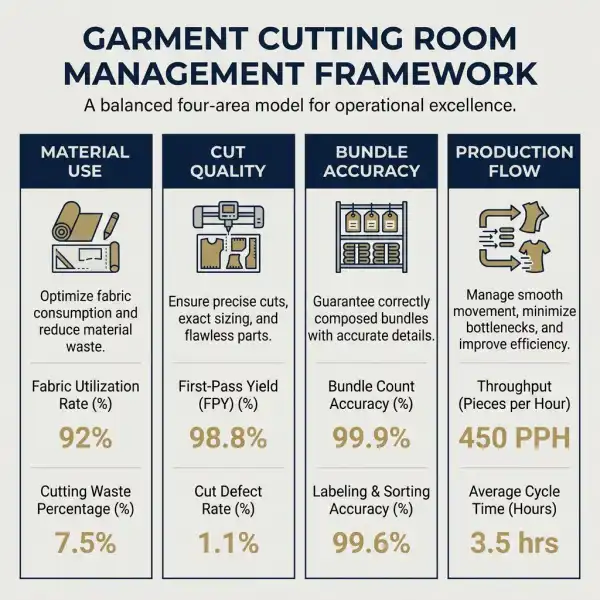
Which Cutting-Room Metrics Actually Help Management?
The most useful metrics connect material, quality, flow, and traceability. One headline number can hide the cause of a problem, so management should read several measures together.
Marker efficiency and actual fabric utilization
Marker efficiency evaluates how densely pattern area occupies the marker area. Actual fabric utilization asks a broader question: how much issued fabric became accepted garment components? The second measure can reveal operational losses outside the digital marker, including roll-end remnants, splices, flaws, and recuts.
Cut-panel acceptance and replacement rate
Factories should track the proportion of panels accepted at first inspection and the quantity recut by reason. Useful reason codes might include cutting inaccuracy, fabric defect, shade issue, incorrect notch, missing component, or handling damage. Without reason codes, a recut total shows cost but not where corrective action belongs.
Bundle completeness and traceability accuracy
A bundle should reach the next operation with the right components, size, color, quantity, and identification. Missing-part incidents, mixed-size incidents, and unidentified panels are more informative than a generic “bundle error” category.
Throughput and work-in-progress age
Throughput shows whether cutting supports the sewing plan, while work-in-progress age reveals bundles waiting for inspection, recuts, fusing, or issue. High output combined with old unresolved bundles is not healthy flow.
A practical cutting-room dashboard can therefore combine material use, first-pass panel acceptance, recut reasons, bundle accuracy, schedule attainment, and safety observations. The measures should lead to decisions, not simply fill a report.
How Can Fashion Businesses Apply This Process Strategically?
Brand teams can influence cutting performance by providing production-ready information and asking suppliers questions that reveal whether controls exist beyond final inspection.
Before bulk cutting, a brand or manufacturer should confirm the approved pattern revision, actual fabric width assumptions, shrinkage basis, size ratio, motif or direction rules, and the method for handling shade lots and defects. For a risky material, a small trial lay can expose contraction, slippage, fraying, edge fusion, or matching difficulty before the full order is committed.
Supplier discussions become more useful when they focus on evidence. Instead of asking whether a factory has “good cutting quality,” ask how it verifies top-to-bottom panel accuracy, records recuts, prevents shade mixing, reconciles cut quantities, and controls pattern-file revisions.
For growing brands, useful practices include:
- include cutting-critical information in the tech pack rather than relying on chat messages;
- request approval for placement when stripes, checks, borders, or engineered prints affect appearance;
- define which defects are acceptable and which require panel replacement;
- agree on how excess fabric, usable remnants, and recuts will be reported;
- separate equipment purchase decisions from process-discipline problems.
Automation can improve repeatability and data capture under appropriate conditions, but it cannot correct an obsolete pattern, incorrect size ratio, or uncontrolled shade mixing. Technology should strengthen a defined process.
Common Mistakes That Weaken an Otherwise Good Cutting Process
Several errors recur because teams optimize one stage without considering the next. The following overview identifies the control issue without replacing the deeper waste analysis in common cutting-room problems that increase fabric waste.
Treating marker efficiency as the whole consumption result
A compact marker can coexist with high actual loss if fabric width varies, end allowances are excessive, defects are handled poorly, or replacement panels are frequent. Compare planned marker consumption with issued fabric, accepted output, remnants, and documented waste.
Cutting before fabric behavior is understood
Skipping relaxation or trial cutting may appear to protect the schedule, but unstable or tensioned fabric can change after cutting. The better approach is to define material-specific preparation from supplier data and production testing.
Allowing pattern revisions to circulate without control
When paper patterns, digital files, and markers have unclear status, the cutting room may use an obsolete component. A single approved source, revision identifier, release authority, and withdrawal process for superseded files reduce this risk.
Measuring plies cut instead of accepted sets delivered
Ply count is activity. Complete, accepted garment sets are usable output. Production reporting should reveal bundles waiting for inspection, recuts, or missing parts.
Recutting from an uncontrolled roll or remnant
This can solve a numerical shortage while introducing a shade mismatch. Replacement pieces should remain linked to their original shade group, size, bundle, and component identity.
Important Technical and Safety Caveats
There is no universal best cutting configuration. Order scale, garment complexity, fabric behavior, matching requirements, available skills, floor space, service capacity, and total ownership cost all affect the suitable method. A small sample room cutting varied styles may reasonably use different equipment from a high-volume factory producing stable repeat orders.
Lay height should never be selected only to maximize pieces per cutting cycle. It must be validated against equipment capacity, material compression or movement, pattern geometry, and top-to-bottom component accuracy. Likewise, a high-speed setting is useful only when cut quality remains within specification.
Cutting machinery also presents serious blade and moving-equipment hazards. Safety controls must follow applicable local law, the equipment manufacturer's instructions, and a site-specific risk assessment. The UK Health and Safety Executive recommends measures including restricted danger areas, warning signals, adjustable blade guards, suitable protective gloves, inspection of guards and fittings, control of lint and offcuts, and a documented system for blade changing and disposal; see its fabric-cutting machinery guidance. Personal protective equipment does not replace guarding, training, maintenance, and safe operating procedures.
Frequently Asked Questions
What comes before fabric cutting in garment production?
Approved pattern development, grading, material confirmation, and production planning normally precede bulk cutting. Within the cutting department, the immediate preparatory steps include reviewing the cutting order, confirming the pattern and marker revision, checking the size ratio, identifying fabric rolls and shade groups, verifying usable width, and preparing or relaxing the material where required. The exact sequence varies by factory. The critical principle is that bulk cutting should not begin until product information, fabric identity, quantities, and special placement rules agree. A pre-cut meeting or release checklist is useful for complex styles, new fabrics, engineered prints, or orders with tight delivery and replacement-fabric constraints.
What is the difference between a pattern, a marker, and a lay?
A pattern defines the shape and construction information for an individual garment component, such as a sleeve or front panel. A marker is an arrangement of graded pattern pieces for selected sizes within a specified fabric width and length. A lay is the physical stack or arrangement of fabric plies spread on the table for that marker. The three are connected but not interchangeable. An accurate pattern can still be used in an inefficient marker, and an efficient marker can still produce poor parts if the lay is tensioned, misaligned, unstable, or cut with unsuitable settings.
Why is fabric relaxed before cutting?
Fabric is relaxed when it may retain tension or deformation from knitting, finishing, rolling, or transport that could change dimensions after spreading or cutting. Allowing the material to settle can reduce the risk that cut panels contract or distort before sewing. Relaxation is especially relevant to many knits and fabrics containing elastomeric fibers, but the need and procedure depend on the material. There is no credible universal relaxation time for every fabric. Factories should use supplier guidance, shrinkage or dimensional-stability tests, actual storage conditions, and production trials to define an appropriate method.
How is fabric wastage calculated in a cutting room?
The calculation depends on what the factory calls waste. Marker waste is the marker area not occupied by pattern pieces. Operational waste may also include end and edge loss, splices, damaged areas, unusable remnants, and recut panels. Define the boundary and units before comparing results; marker efficiency is not total fabric utilization. Reconcile fabric issued against accepted components, usable remnants, and categorized waste.
Can one marker be used for every fabric width?
Usually not without verification. A marker is prepared for a defined usable width, and using it on narrower fabric may force pieces outside the available area or reduce required edge clearance. Wider fabric may permit a different arrangement with better utilization, but the original marker will not automatically take advantage of it. Actual usable width can also vary between rolls. Factories commonly group rolls by width or create suitable marker variants where variation is material. Direction, motif matching, nap, and defect constraints must still be respected even when the width appears compatible.
Should every cut component be inspected?
The appropriate inspection extent depends on product risk, process capability, buyer requirements, and the factory's quality plan. Some improvement guidance recommends inspecting all cut parts before numbering and bundling, while other operations use defined sampling plus top, middle, and bottom-ply checks. The decision should not be arbitrary. New styles, unstable fabrics, high lays, strict matching, or prior cutting failures justify stronger controls. Whatever the level, the factory needs clear acceptance criteria, traceable defect records, and an escalation method that prevents nonconforming components from entering sewing.
What should a fashion brand ask a garment factory about cutting?
Ask for process evidence: How are revisions controlled? How is usable width confirmed? How are shade lots segregated? Which fabrics are relaxed, and why? How is top-to-bottom accuracy checked? How are recuts linked to the original shade and bundle? Which losses enter consumption reports? How are guards, maintenance, and operator training controlled? For a critical order, request sample records or observe a trial lay and bundle handover.
Conclusion
Fabric cutting is the controlled conversion point between material inventory and garment assembly. Its job is to deliver accurate, complete, traceable components—not simply to cut the largest possible number of plies. Reliable performance begins with approved information, realistic material preparation, a marker suited to the order and usable width, stable spreading, validated cutting parameters, meaningful inspection, and disciplined numbering and bundling.
For fashion brands and manufacturers, the strongest improvement opportunity is often better control at the interfaces: product development to cutting, fabric inspection to lay planning, and cutting to sewing. When those handovers are clear, equipment and software can amplify a sound process. When they are weak, faster cutting can magnify errors. The practical objective is therefore balanced: protect fabric value, preserve garment accuracy, maintain safe operations, and feed downstream production with accepted sets on schedule.





Comments 0
Leave a CommentSend Comment
Anda harus Login terlebih dahulu untuk dapat memberikan komentar.