


Garment Quality Control Process Explained Step by Step
What Is the Garment Quality Control Process?
Garment quality control is the structured process of checking whether apparel products meet agreed specifications before they move to the next production stage or reach customers. It usually covers fabric and trim inspection, pre-production sample approval, inline inspection during sewing, measurement checking, workmanship review, finishing inspection, packaging control, and final shipment inspection.
A good garment quality control process does not depend only on inspecting finished garments at the end. It works best when quality is built into each stage of production. This means brands and manufacturers need clear tech packs, approved samples, measurement tolerances, defect classifications, production records, and corrective action procedures.
In many factories, final inspection may use acceptance sampling methods such as AQL, which is connected to ISO 2859-1 sampling procedures for inspection by attributes. This helps buyers and suppliers make pass-or-fail decisions based on a defined sample size and acceptable defect limits. But sampling is not a substitute for process control. It is only one part of a broader quality system.
For fashion businesses, the real value of garment quality control is operational clarity. It reduces avoidable rework, late shipments, customer complaints, return risks, and brand damage.
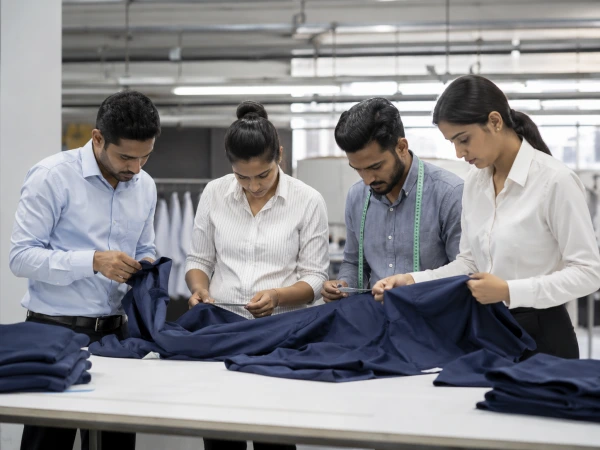
Why Garment Quality Control Starts Before Sewing
Garment quality control often looks like a final inspection activity from the outside. A buyer visits the factory, a third-party inspector checks cartons, the report says pass or fail, and the shipment moves forward. In reality, the most reliable quality outcomes are usually shaped much earlier.
Before a sewing line starts production, several decisions have already affected quality: fabric selection, shrinkage control, pattern accuracy, seam construction, thread compatibility, trims, wash process, size grading, and packaging requirements. If these decisions are unclear, the factory floor may still produce garments quickly, but not necessarily garments that match the brand’s expectations.
This is why quality control should be treated as a production system, not a last-minute filter. The goal is not only to find defects. The goal is to prevent predictable defects from becoming repeated production problems.
In apparel manufacturing, a small technical misunderstanding can scale quickly. If one sleeve measurement is wrong in a production pattern, hundreds or thousands of garments may be affected. If a fabric shrinks more than expected after washing, the approved size chart becomes unreliable. If labels are approved late, packaging may be delayed even when the garments themselves are complete.
The step-by-step garment quality control process exists to catch these risks early, verify them during production, and document them before shipment.
Step 1: Confirm Product Specifications and Quality Standards
The first step is not inspection. It is alignment.
A garment cannot be checked properly if the buyer, factory, merchandiser, pattern maker, sewing supervisor, and quality control team are working from different assumptions. A clear specification package gives everyone the same reference point. This is especially important for export production, private label manufacturing, multi-style collections, and brands working with overseas suppliers.
A practical garment specification package usually includes the following documents and references:
- Tech pack with style details, construction notes, and bill of materials.
- Approved fit sample or pre-production sample.
- Measurement chart with tolerances.
- Fabric and trim specifications.
- Color standard or lab dip approval.
- Stitching and seam construction requirements.
- Labeling, care instruction, and packaging details.
- Defect classification guidelines.
- Inspection method and acceptance criteria.
These documents do not need to be overly complicated, but they must be specific enough to prevent interpretation gaps. A phrase like “good stitching quality” is not operationally useful. A clearer instruction might specify stitch type, stitch density, seam allowance, thread color, seam appearance, and acceptable tolerance.
This is also where brands should define what counts as critical, major, and minor defects. A loose thread may be minor in some products, while a sharp broken needle fragment would be critical. A visible stain on a premium white shirt may be treated more severely than a small internal thread end on a lining. The classification must match product type, selling price, customer expectation, safety risk, and brand positioning.
For a deeper discussion of defect categories, the related article common apparel defects and prevention methods can expand the issue without overloading this process-focused guide.
Step 2: Inspect Fabric and Trims Before Cutting
Fabric inspection is one of the most commercially important quality control stages because fabric problems become far more expensive after cutting. Once fabric is cut into panels, the opportunity to reject or isolate defective yardage becomes limited.
Fabric inspection normally checks visible defects, color consistency, shade variation, width, weight, hand feel, construction, and shrinkage behavior. For printed or patterned fabrics, the inspection may also review print alignment, pattern repeat, color registration, and panel placement risks.
A fabric roll can look acceptable at first glance but still create production issues. Shade variation between rolls may lead to visible color differences between garment panels. Poor fabric relaxation can distort cutting accuracy. Uncontrolled shrinkage can make finished measurements unstable. For stretch fabrics, recovery and spirality may affect fit after washing or wearing.
Trim inspection is equally practical. Zippers, buttons, snaps, elastic, drawcords, labels, interlining, and packaging materials should be checked before they enter production. A garment can be sewn perfectly but still fail if the zipper jams, the button color is wrong, or the care label information does not match the approved requirement.
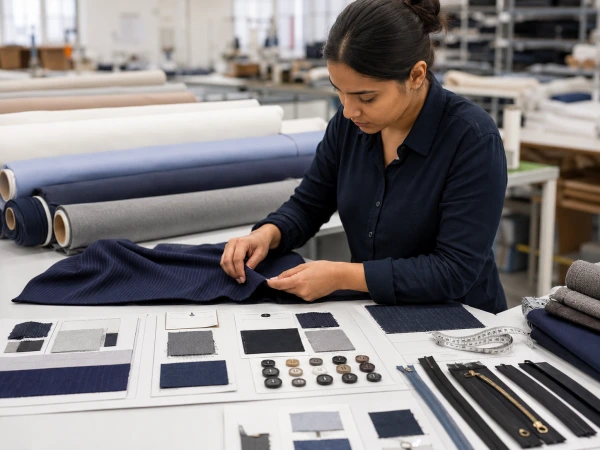
What Should Be Checked Before Cutting?
The specific checks depend on product type, material, and buyer requirement, but most factories should verify the basics before spreading and cutting:
- Fabric defects such as holes, stains, slubs, weaving faults, barre, and print defects.
- Shade consistency between rolls and within the same roll.
- Fabric width, GSM or weight, and usable width.
- Shrinkage after washing or steaming, when relevant.
- Fabric relaxation, especially for knits and stretch materials.
- Trim color, size, function, quantity, and durability.
- Label content, placement, and approved language.
- Packaging materials such as polybags, hangtags, cartons, and barcodes.
This stage should produce a record, not just a verbal approval. If the factory identifies shade bands, fabric defects, or shrinkage issues, the record helps the merchandising and production teams decide whether to segregate rolls, adjust cutting plans, request replacement material, or revise expectations with the buyer.
Step 3: Review Patterns, Grading, and Pre-Production Sample
The pre-production sample is the bridge between design intention and bulk production reality. It is where the brand sees whether the factory can translate the tech pack into a manufacturable garment.
This stage should confirm fit, construction, measurements, fabric behavior, workmanship, and finishing details before bulk production starts. For fashion brands, it is also the moment to check whether the product still looks commercially right after technical adjustments. A technically acceptable garment can still feel wrong if the proportion, drape, or finishing does not match the brand’s positioning.
Pattern and grading review are essential because size consistency affects customer satisfaction directly. A medium size may fit correctly, but the large size may become too long in the sleeve or too wide in the shoulder if the grading rule is poorly controlled. For e-commerce brands, this can create returns, negative reviews, and size-related customer service issues.
A strong pre-production approval should answer three operational questions:
- Can the factory make this garment repeatedly at bulk scale?
- Are the measurements and construction methods approved?
- Are all materials, trims, labels, and finishing standards ready for production?
Once the pre-production sample is approved, it should be kept as a reference sample. The factory QC team, sewing supervisors, and finishing team can then compare bulk production against the approved standard.
Step 4: Conduct Cutting Inspection
Cutting inspection is sometimes treated as a simple production checkpoint, but it has a major effect on garment consistency. Even when fabric and patterns are correct, poor cutting can create twisted seams, uneven panels, mismatched stripes, inaccurate sizing, and sewing difficulties.
The cutting process normally includes fabric relaxation, spreading, marker placement, cutting, bundling, numbering, and panel control. Each activity needs discipline. If fabric is not relaxed properly, especially in knits or stretch materials, panels may change shape after cutting. If plies shift during spreading, the top and bottom layers may not match. If bundle numbering is weak, shade-matched panels may be mixed incorrectly.
Cutting inspection should verify panel accuracy before sewing begins. At this stage, QC can still prevent large-scale problems by isolating defective panels or correcting cutting-room practices.
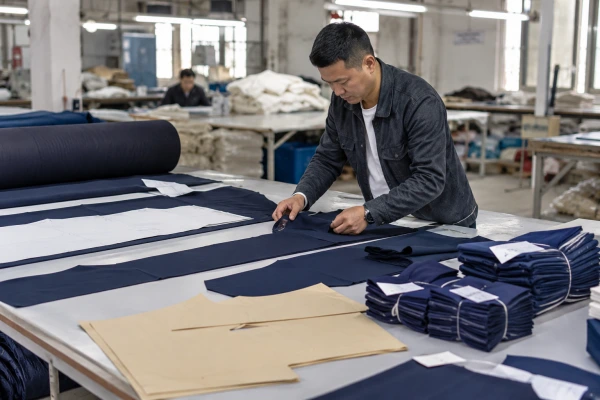
Key Cutting Quality Checks
Cutting inspection should focus on practical issues that will affect sewing and finished garment quality:
- Panel shape and size accuracy against pattern.
- Fabric grain direction and nap direction.
- Stripe, check, or print matching where required.
- Shade grouping and bundle numbering.
- Notch placement and drill marks.
- Cutting edge cleanliness.
- Defective panels removed before sewing.
- Quantity accuracy by size and color.
The cutting team should not be pressured to move defective panels forward just to maintain sewing line output. If the cutting room hides problems, the sewing line inherits them, and the finishing team is left to manage defects that were preventable earlier.
Step 5: Use Inline Inspection During Sewing
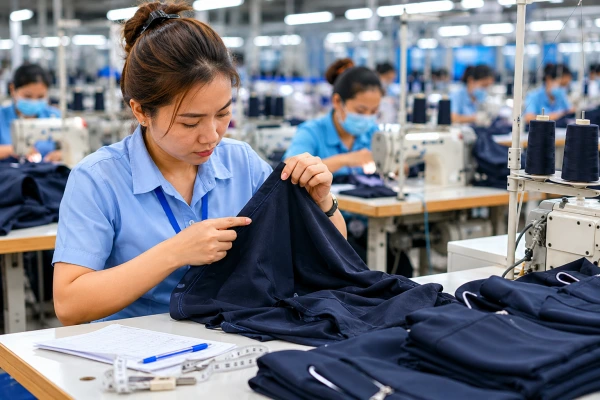
Inline inspection is one of the most valuable parts of garment quality control because it checks quality while production is still active. Instead of waiting until all garments are finished, QC staff inspect work-in-progress pieces at different sewing operations.
This allows the factory to detect problems quickly. If pocket placement is wrong, seam tension is poor, or sleeve attachment is inconsistent, supervisors can correct the operation before the same defect appears across a large quantity.
Inline inspection is not meant to punish operators. In a mature production environment, it functions as feedback. It helps the line understand whether the approved method is being followed, whether machines are correctly adjusted, and whether workers need additional guidance.
Typical inline inspection areas include seam appearance, stitch density, seam strength, measurement control, panel matching, thread tension, operation sequence, and workmanship consistency. For complex garments such as jackets, outerwear, uniforms, sportswear, lingerie, or tailored pieces, inline inspection may need more checkpoints because construction defects become harder to repair later.
Why Inline Inspection Matters More Than Final Sorting
Final inspection can identify whether a shipment is acceptable, but it cannot easily fix a weak process. Inline inspection can.
For example, if the QC team discovers skipped stitches during final inspection, the factory may need to inspect many finished garments and repair affected seams. But if the same issue is detected inline, the team can check needle size, thread compatibility, machine setting, operator handling, or fabric feeding before the defect spreads.
This is where quality control becomes process control. Instead of asking, “How many defective garments did we find?” the better question becomes, “Which operation caused the defect, and how do we stop it from repeating?”
Step 6: Check Measurements Against Approved Tolerances
Measurement checking is a technical but very human issue. Customers do not experience a garment as a specification sheet. They experience it as fit, comfort, proportion, and confidence. When measurements are inconsistent, even attractive garments may feel unreliable.
QC teams usually measure garments at defined points of measurement such as chest width, waist, hip, shoulder, sleeve length, body length, inseam, rise, cuff opening, hem opening, or collar size. The correct points depend on garment type.
Measurement tolerances should be agreed before production. A tolerance is not permission to be careless. It is a realistic range that recognizes the limitations of fabric behavior, sewing construction, pressing, washing, and manual production. A woven shirt may require different tolerance logic from a stretch knit dress or washed denim jeans.
Measurement checking should happen at several stages: pre-production sample, inline production, finishing, and final inspection. If measurement problems appear early, the factory can adjust sewing operations, pressing methods, washing process, or pattern control.
Measurement Control Requires Context
Not every measurement deviation has the same impact. A small difference in body length may be acceptable for a casual oversized T-shirt, while a similar deviation in a tailored blazer sleeve may be more noticeable. A waistband measurement issue may directly affect wearability. A pocket opening issue may affect function. A shoulder slope problem may affect fit even if the numeric measurement appears close.
For brands, this means tolerance decisions should reflect product category, price position, fabric type, and customer expectation. Measurement control is technical, but the commercial consequence is customer trust.
Step 7: Inspect Workmanship, Appearance, and Finishing
Once garments move into finishing, the QC focus shifts toward finished appearance. This includes pressing, thread trimming, stain removal, labels, accessories, button attachment, zipper function, symmetry, and overall presentation.
Finishing quality matters because customers often judge garments quickly. Loose threads, uneven pressing, poor folding, visible stains, or weak button attachment can make a garment feel cheaper than it really is. For premium brands, these details are not cosmetic extras. They are part of perceived value.
This stage should also confirm that repairs have not created new problems. A repaired seam should still look clean. A stain treatment should not leave a visible mark. Pressing should improve appearance without damaging fabric surface, causing shine, distorting shape, or flattening intentional texture.
The inspection should be practical and product-specific. A tailored wool coat, a washed denim jacket, a children’s dress, a performance legging, and a silk blouse each require different attention points. The QC system should be consistent, but not blind to category differences.
Step 8: Conduct Final Inspection Before Shipment
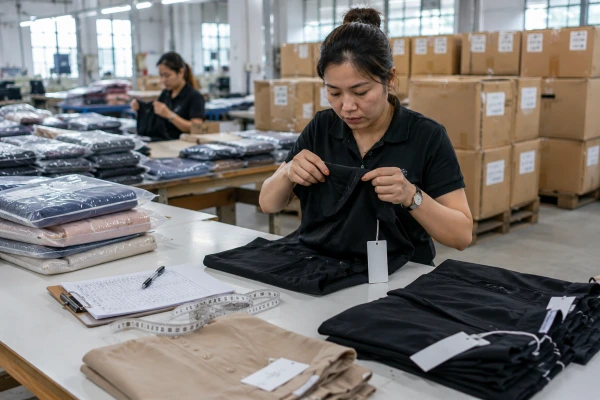
Final inspection is the last formal checkpoint before goods are shipped. It is normally conducted when production is complete or nearly complete, garments are packed or ready for packing, and cartons are available for review.
Many brands and inspection agencies use acceptance sampling rather than checking every single unit. ISO 2859-1 specifies an acceptance sampling system for inspection by attributes, indexed by acceptance quality limit. In garment inspection practice, AQL-based sampling is commonly used to determine how many units to inspect and how many defects may be accepted before the lot fails. ISO 2859-1 sampling procedures
The important point is that AQL is a decision method, not a promise that every garment in the shipment is defect-free. It helps buyers and suppliers make a statistically structured decision from a sample. For high-risk products, new suppliers, premium quality levels, or safety-sensitive children’s products, brands may choose stricter inspection levels or additional testing.
What Final Inspection Usually Covers
Final inspection typically reviews both product quality and shipment readiness. The scope may vary by buyer, but common checks include:
- Quantity verification by style, color, and size.
- Workmanship and visible defect inspection.
- Measurement checking on selected samples.
- Label, hangtag, barcode, and care label verification.
- Packaging method, folding, polybag, carton marking, and assortment.
- Functional checks for zippers, buttons, snaps, drawcords, or closures.
- Color and shade consistency.
- General appearance after pressing and packing.
- Defect classification and pass-or-fail decision.
The final inspection report should clearly separate observed facts from judgment. A useful report does not simply say “quality problem found.” It identifies the defect type, location, quantity, severity, sample size, photos, measurements, and recommended action.
Step 9: Classify Defects and Decide Corrective Action
Defect classification turns inspection findings into business decisions. Without classification, every problem can feel equally urgent, which makes quality management inefficient.
Most garment inspection systems classify defects into three broad groups: critical, major, and minor. Critical defects may involve safety, legal compliance, or serious product failure. Major defects are likely to affect saleability, appearance, fit, function, or customer satisfaction. Minor defects are less likely to affect usability but may still need monitoring, especially if they appear repeatedly.
The classification should not be arbitrary. It should reflect buyer standards, product category, retail channel, and customer expectation. A loose button on a children’s garment may be treated more seriously than a loose decorative thread inside an adult garment. A tiny shade difference may be less visible in a textured fabric but unacceptable in a clean solid-color luxury blouse.
Corrective action should address the cause, not only the symptom. If multiple garments have uneven hems, the answer may not be “repair the hems.” The better investigation might examine folding method, pressing, operator training, machine guide, cutting accuracy, or handling during bundling.
Corrective Action Should Be Practical
Corrective action can include rework, sorting, replacement, production adjustment, operator retraining, machine maintenance, material replacement, or buyer approval for a controlled deviation. The right decision depends on severity, quantity affected, delivery timeline, and commercial impact.
A professional QC process documents the action taken and verifies whether the issue is resolved. Otherwise, the same defect may return in the next order.
Step 10: Review Packaging, Cartons, and Shipment Readiness
Packaging is part of quality control because it affects how garments arrive, how retailers receive them, and how customers experience them. Poor packaging can damage finished garments after all sewing and finishing work has already been completed.
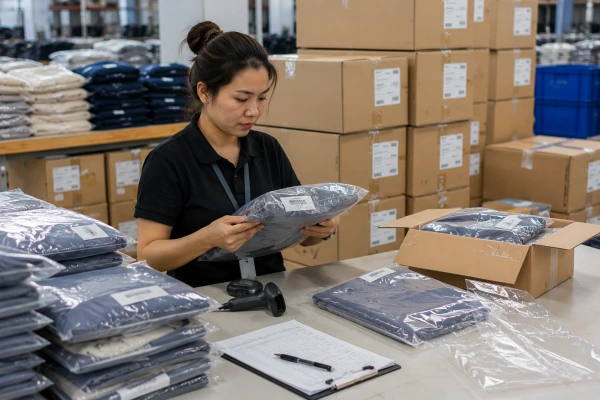
QC should verify folding method, polybag size, size sticker, barcode, carton assortment, carton strength, shipping marks, and packing ratio. For retail and e-commerce brands, packaging accuracy is not only aesthetic. It affects warehouse receiving, inventory control, fulfillment, and customer returns.
A garment may pass workmanship inspection but still fail shipment readiness if cartons are mislabeled, barcodes are wrong, size assortment is incorrect, or care labels do not match the approved information. These errors can create expensive downstream problems even when the physical garment is acceptable.
How Fashion Businesses Can Apply This Process Strategically
For fashion brands, garment quality control should not be treated as a factory-only responsibility. The brand sets the standard, the manufacturer executes it, and both sides need a shared process.
Small fashion startups often rely heavily on supplier experience, especially when they do not yet have an internal technical team. That can work for simple products, but it becomes risky when styles become more complex, materials become more sensitive, or production quantities increase. A brand that wants consistent quality needs at least basic technical documentation and a repeatable inspection logic.
Manufacturers also benefit from stronger QC systems. Clear quality standards reduce disputes, improve production discipline, and help factories build trust with buyers. A factory that can explain its inline inspection process, defect tracking, corrective action system, and final inspection method is easier for professional buyers to evaluate.
For sourcing teams and retail operators, QC data can support better supplier decisions. Repeated measurement issues, late corrective action, weak packaging accuracy, or inconsistent workmanship may indicate supplier capability gaps. At the same time, a supplier should not be judged only by one failed inspection if the root cause was unclear buyer instruction or late material approval.
A practical implementation approach may look like this:
- For new suppliers: start with stricter pre-production approval, fabric checks, and inline inspection.
- For repeat suppliers: track defect patterns across orders and adjust risk controls.
- For premium products: define tighter visual standards and more detailed workmanship criteria.
- For fast-moving products: prioritize early-stage prevention to avoid costly rework near shipment.
- For e-commerce brands: monitor measurement consistency and packaging accuracy closely because returns often expose these issues quickly.
Quality control becomes more valuable when it becomes a learning system. The best question after each order is not only “Did this shipment pass?” but “What did this order teach us about our product, supplier, material, and process?”
Common Mistakes in Garment Quality Control
Many quality problems are not caused by a lack of inspection. They are caused by weak decisions before inspection begins.
Mistake 1: Treating Final Inspection as the Main Quality Strategy
Final inspection is important, but it is too late to be the only quality strategy. By the time final inspection happens, the fabric has been cut, garments have been sewn, finishing is complete, and the shipment may be close to deadline.
This mistake happens because final inspection feels concrete. It produces a report, a pass-or-fail result, and visible photos. But if the sewing line has been producing the same defect for days, final inspection becomes a sorting exercise rather than a prevention system.
A better approach is to combine pre-production approval, material inspection, inline inspection, finishing checks, and final inspection. Each stage should reduce risk before the next stage adds more cost.
Mistake 2: Using Vague Quality Standards
Many disputes happen because “acceptable quality” was never defined clearly. The buyer expects one standard. The factory applies another. The inspector arrives at the end and has to interpret both.
Vague standards create inconsistent decisions. One inspector may accept a loose thread. Another may reject it. One merchandiser may approve slight puckering. Another may demand rework. This inconsistency frustrates factories and weakens buyer confidence.
The better approach is to define defect classification, measurement tolerances, workmanship expectations, and approved samples before bulk production. Quality standards should be written, visual, and accessible to the people making decisions.
Mistake 3: Ignoring Fabric Behavior
Fabric behavior can quietly undermine garment quality. Shrinkage, spirality, shade variation, stretch recovery, skewing, pilling tendency, and surface sensitivity can all affect finished garments.
This mistake often happens when brands focus on style and price but do not verify material performance early enough. The garment may look good in sampling but become inconsistent in bulk production.
The better approach is to inspect fabric before cutting, conduct relevant testing where needed, and align production methods with material behavior. A delicate fabric, a stretch knit, a washed denim, and a coated textile cannot be managed with identical assumptions.
Mistake 4: Not Recording Defect Patterns
If defects are repaired but not recorded, the factory loses learning value. The same problem may return in the next order because no one has tracked frequency, operation, operator, machine, material lot, or corrective action.
This is especially risky for growing brands. As production volume increases, informal problem-solving becomes less reliable. What worked for 100 pieces may not work for 10,000 pieces.
A better system uses defect reports to identify recurring issues. Even a simple spreadsheet can help teams see which styles, suppliers, operations, or materials create the most quality risk.
Important Technical Caveats
Garment quality control is not a universal checklist that works identically for every product. A formal shirt, activewear legging, denim jacket, evening dress, children’s garment, uniform, and technical outerwear each require different inspection priorities.
Sampling inspection also has limits. AQL-based inspection can support shipment decisions, but it does not inspect every unit and does not remove the need for process control. ISO 2859-1 provides an acceptance sampling system for inspection by attributes, but brands still need to choose inspection levels, defect classifications, and acceptance limits that match their product and risk profile. ISO 2859-1 acceptance sampling
Quality management systems are broader than inspection. ISO 9001, for example, is built around quality management principles and continual improvement, not merely end-stage checking. ISO 9001 quality management For garment businesses, this distinction matters because a factory can inspect products frequently while still lacking a mature quality system.
Responsible sourcing also intersects with quality, but it is not the same topic. The OECD guidance for garment and footwear supply chains focuses on responsible business conduct and due diligence, which may include supplier management and risk assessment, but it should not be used as a substitute for technical garment inspection standards. OECD garment and footwear due diligence guidance
FAQ: Garment Quality Control Process
What are the main stages of garment quality control?
The main stages usually include product specification review, fabric and trim inspection, pre-production sample approval, cutting inspection, inline sewing inspection, measurement checking, finishing inspection, packaging review, and final inspection before shipment. The exact sequence may vary depending on product type, factory workflow, buyer requirement, and production scale. A simple T-shirt order may need fewer checkpoints than a tailored jacket or technical outerwear style. The key principle is to control quality before defects become expensive. Good QC is not only about finding problems at the end; it is about reducing risk throughout production.
What is the difference between inline inspection and final inspection?
Inline inspection happens during production, while garments are still being sewn or assembled. It helps identify process problems early, such as uneven stitching, incorrect seam construction, or measurement drift. Final inspection happens near the end, when goods are finished and often packed or ready to pack. Final inspection helps decide whether the shipment meets the agreed standard. Inline inspection is more preventive, while final inspection is more evaluative. Both are useful, but relying only on final inspection can lead to costly rework if defects have already spread across the production lot.
What does AQL mean in garment inspection?
AQL usually refers to Acceptance Quality Limit. In garment inspection, it is commonly used with sampling plans to decide how many units to inspect and how many defects may be accepted before a lot fails. It is important to understand that AQL does not guarantee that all uninspected garments are defect-free. It is a structured sampling method for lot acceptance decisions. Brands should define AQL levels carefully based on product risk, price position, customer expectation, and defect severity. Critical defects are often treated much more strictly than minor cosmetic defects.
Who is responsible for garment quality control?
Responsibility is shared. The brand or buyer is responsible for clear specifications, approved samples, realistic tolerances, and timely decisions. The manufacturer is responsible for controlling production, training operators, inspecting work, and correcting defects. Merchandisers, technical teams, QC inspectors, line supervisors, and finishing teams all play a role. Third-party inspectors may support final inspection, but they cannot replace internal discipline from buyer and factory teams. The strongest quality outcomes usually happen when both sides treat QC as a collaborative production system, not just a final negotiation before shipment.
How can small fashion brands manage quality control with limited budget?
Small brands should focus first on clarity and prevention. They may not need a complex QC department, but they do need a clear tech pack, approved sample, measurement chart, fabric and trim confirmation, and written quality expectations. For new suppliers or important orders, they can use inline video checks, production photos, sample reviews, or third-party inspection when budget allows. The most practical investment is often better documentation. A small brand that gives clear instructions and checks early production is usually in a stronger position than one that waits until finished goods arrive.
What are the most common garment quality control failures?
Common failures include unclear specifications, poor fabric inspection, inconsistent measurements, weak inline checking, incorrect labels, poor pressing, loose threads, stains, shade variation, packaging mistakes, and late corrective action. Many of these failures are preventable. They often happen because teams rush into production before confirming materials, samples, tolerances, and inspection standards. For a deeper defect-focused discussion, see common apparel defects and how manufacturers prevent them. This article focuses on the process sequence, while defect prevention requires a closer look at specific defect types and root causes.
Why does quality inspection matter for fashion production?
Quality inspection matters because apparel products carry both functional and emotional expectations. Customers expect garments to fit, look good, feel comfortable, and match the brand promise. Poor quality can lead to rework, returns, markdowns, delayed shipments, customer complaints, and brand reputation problems. Inspection also gives brands and factories useful data about recurring production risks. The broader business case is explored in why quality inspection matters in fashion production, which focuses more on strategic value, cost control, and customer trust.
Conclusion: Quality Control Is a Production Discipline, Not a Final Gate
Garment quality control works best when it is built into the production journey from the beginning. The process starts with clear specifications, continues through material and sample approval, protects consistency during cutting and sewing, and ends with final inspection and shipment verification.
For fashion businesses, this step-by-step approach is more than a technical routine. It is a way to protect product value, supplier relationships, delivery timelines, customer satisfaction, and brand credibility. A garment that looks simple on the rack may depend on dozens of controlled decisions behind the scenes.
The strongest QC systems are practical rather than bureaucratic. They define standards clearly, check risks early, document findings, classify defects intelligently, and use each production order as feedback for the next one. That is how quality becomes repeatable.
Not perfect. Repeatable.
And in garment production, repeatability is often what separates a promising fashion product from a scalable fashion business.





Comments 0
Leave a CommentSend Comment
Anda harus Login terlebih dahulu untuk dapat memberikan komentar.