

Common Finishing Mistakes That Make Apparel Look Less Professional
Quick Answer
The finishing mistakes that most often weaken apparel presentation are using one pressing method for different materials, applying excessive heat or pressure, using the wrong support surface, pressing over stains or loose threads, skipping cooling, repeatedly re-pressing unstable areas, and packing garments before the finished shape has settled. Inconsistent inspection, poor lighting, dirty equipment, and unclear acceptance standards make these problems harder to detect.
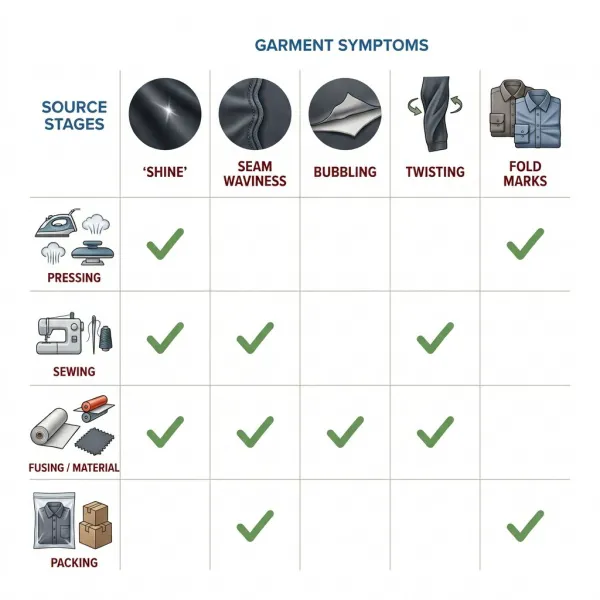
Some apparent finishing defects actually begin earlier. Seam puckering may come from sewing tension or feed; bubbling may come from fusing; twisting may come from cutting, grain alignment, or dimensional instability. Pressing can temporarily disguise these faults but rarely corrects their cause.
The practical solution is a style-specific finishing standard supported by a complete-garment trial, approved sample, documented operating window, clear defect categories, cooling and inspection rules, and a repair route that sends each fault back to the responsible process. Professional presentation does not mean making every garment equally crisp. It means delivering the intended shape, surface, texture, and fold consistently without damaging the product or concealing nonconformity.
What Counts as a Garment Finishing Mistake?
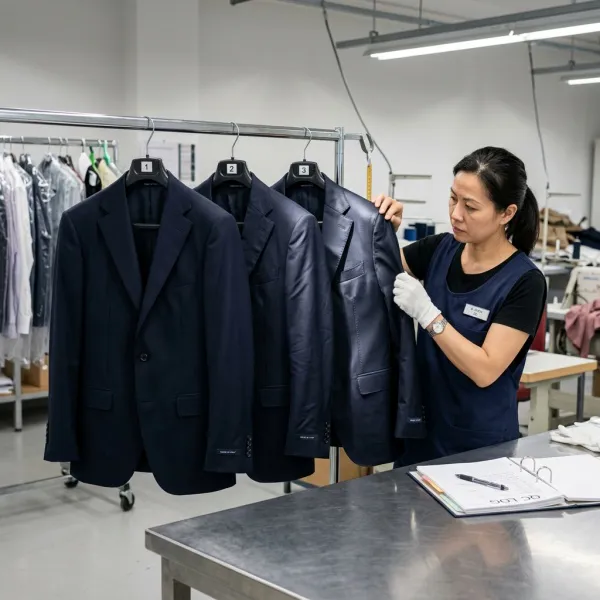
A garment finishing mistake is an error in pressing, cleaning, inspection, presentation, or packing that prevents a completed garment from matching its approved saleable condition. It may create a new defect, fail to remove a correctable presentation problem, or allow an upstream defect to pass because finishing temporarily hides it.
The last category is often misunderstood. A final operator may receive a twisted seam, poorly fused placket, stretched neckline, or unstable measurement and make it look acceptable long enough to pass inspection. If the fault returns after cooling, hanging, shipping, or care, the factory has not finished the product successfully. It has delayed the evidence.
Finishing quality should therefore be judged against the design intent and technical specification, not against a generic preference for flatness. A structured blazer, softly washed linen shirt, bias-cut dress, velvet jacket, pleated skirt, and performance shell require different surface and shape standards.
Why Finishing Defects Are Easy to Misdiagnose
Finishing sits near the end of production, where the consequences of cutting, fusing, sewing, wet processing, handling, and storage become visible together. The same symptom can have several causes. A wavy seam may reflect thread tension, differential feed, fabric instability, retained moisture, or premature stacking. A shiny area may come from excessive press pressure, but it may also be a fabric or finish sensitivity revealed by an otherwise normal cycle.
This is why “poor ironing” is an unhelpful universal defect code. It directs responsibility to one department without showing what must change. A more useful diagnosis separates the visible symptom, its persistence, the likely source, and the correct route.
|
Visible symptom |
Possible finishing cause |
Possible upstream cause |
First diagnostic step |
|
Seam remains wavy |
Insufficient support or incomplete cooling |
Feed imbalance, thread tension, differential shrinkage |
Compare before pressing, after cooling, and after relaxation |
|
Surface shine |
Excess heat, pressure, dwell, or dirty soleplate |
Sensitive finish or already glazed fabric |
Inspect an unpressed control under directional light |
|
Bubbling or rippling |
Excessive heat or steam affecting bond |
Incorrect fusing recipe, interlining mismatch, contamination |
Test bond and compare pre-press condition |
|
Twisted side seam |
Garment distorted during steaming or hanging |
Off-grain cutting, fabric skew, sewing imbalance |
Lay flat and check grain, panel alignment, and seam path |
|
New fold marks |
Folding while warm or over-compression |
Packing dimensions or carton loading problem |
Repeat pack-out after full cooling |
|
Uneven collar or lapel |
Wrong buck, positioning, sequence, or pressure |
Pattern, interlining, tape, or assembly imbalance |
Compare left and right construction before re-pressing |
The first question should not be “Which press setting should we change?” It should be “At what point did the symptom first appear?”
Mistake 1: Using One Pressing Recipe for Every Style
Fiber content is not a complete process specification. Two garments labeled 100% polyester can differ in filament structure, weave, dye, print, coating, previous heat treatment, interlining, elastic, transfer decoration, and trim. Even color can change how readily surface flattening or shine becomes visible.
A single “polyester setting” or “cotton setting” is attractive because it simplifies training. Operationally, it transfers risk to the product. One style may remain wrinkled while another becomes glazed, distorted, or delaminated under the same nominal condition.
The better approach is to approve an operating window for each materially distinct style or style family. Test temperature, moisture or steam, pressure, dwell time, vacuum, support, and cooling as a combination. Consumer care symbols can help identify sensitivities, but they are not factory recipes. GINETEX, for example, differentiates maximum soleplate conditions and warns that steam may cause irreversible damage to some low-temperature articles in its official ironing-symbol guidance.

Mistake 2: Testing Only the Shell Fabric
A fabric swatch may tolerate pressing that damages the finished garment. Once assembled, the product includes thread, fusible interlining, elastic, zipper tape, labels, embroidery, buttons, snaps, padding, coatings, transfers, sequins, and other components. Heat, steam, and pressure reach these layers differently depending on their position and thickness.
The failure often appears locally: a print becomes glossy, an elastic edge loses recovery, a zipper leaves an impression, or an adhesive layer shifts around a placket. Because most of the garment looks acceptable, the problem may be missed until bulk inspection.
Validate the full assembly in every risk area, not merely a flat shell panel. When a complete sample is unavailable, build representative test assemblies using the production fabric, color, interlining, seams, trims, and decoration. Re-test after substitutions. A cheaper interlining or revised heat transfer can invalidate an earlier approval even when the main fabric has not changed.
Mistake 3: Treating More Heat, Steam, or Pressure as Better Finishing
When a wrinkle or seam does not respond, operators may increase one variable until the surface looks flat. This can produce shine, scorching, crushed pile, seam impressions, color change, adhesive movement, distortion, retained moisture, or hard edges that do not belong to the design.
The mistake usually reflects a missing diagnostic. A resistant wrinkle may require more moisture, better vacuum, a different support, a revised sequence, or correction at an earlier production stage—not simply a hotter press. If the fabric or construction is unstable, greater exposure can make the condition worse.
Industrial heat setting should also not be confused with final pressing. High-temperature textile processes can stabilize thermoplastic fibers under controlled conditions; Cotton Incorporated describes heat setting within mechanical textile finishing. A final garment press is not a substitute for that engineered fabric process.
Set upper and lower limits, define a single approved cycle, and require escalation after a specified number of unsuccessful attempts. Unlimited re-pressing is not craftsmanship. It is an uncontrolled cumulative exposure.
Mistake 4: Pressing Curved Garment Areas on Flat Surfaces
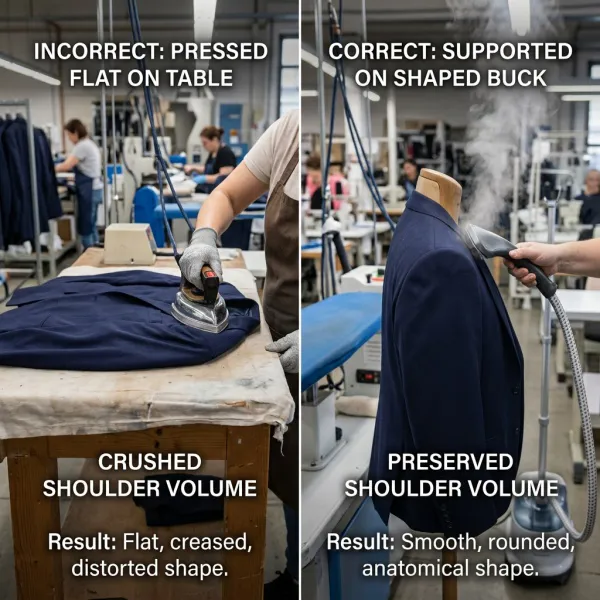
Collars, sleeve caps, shoulders, princess seams, bust shaping, lapels, and trouser seats are three-dimensional. Pressing them flat can create sharp folds, stretch edges, crush volume, or change the geometry that the pattern and construction established.
This mistake is common when a factory has suitable irons but lacks appropriate bucks, sleeve boards, forms, padding, or changeover time. Operators adapt the garment to the table instead of adapting the support to the garment. The result may look tidy when laid flat and wrong when placed on a body.
Use shaped support that follows the intended curve and specify where the garment should remain lifted or rounded. Inspection must include a hanger, mannequin, or fit model where shape matters. The relationship between support, seam geometry, and visible drape is discussed more fully in how pressing affects garment shape, drape, and perceived quality.
Mistake 5: Pressing Over Threads, Stains, Lint, or Hardware
Loose threads, lint, chalk, oil, soil, and unidentified stains should be assessed before heat and pressure are applied. Pressing over contamination can make it harder to remove, spread it, transfer it to equipment, or leave an impression. Pressing directly over buttons, zippers, snaps, hooks, or thick seam intersections can mark the garment face or damage the component.
The underlying problem is often workflow. When trimming and cleaning are placed entirely after pressing, operators receive garments that are not ready for the surface treatment. When spot cleaning is informal, they may attempt to hide a mark with steam or continue pressing around it.
Introduce a pre-press readiness check and a controlled cleaning route. Unknown stains should not be treated with an improvised solvent. Better Work has documented garment-factory findings involving inadequate spot-cleaning areas, missing training, and absent protective controls, illustrating why spot cleaning requires managed equipment, training, and worker protection. Cleaning quality and chemical safety must be addressed together.
Mistake 6: Working With Dirty, Worn, or Unstable Equipment
A good recipe cannot compensate for a contaminated soleplate, damaged hose, inconsistent steam, blocked vacuum, wet steam, compressed padding, poorly fitted cover, leaking valve, or inaccurate control. These conditions create intermittent marks and variable results that operators may mistakenly attribute to fabric variation.
Equipment defects also encourage unsafe workarounds. An operator may wrap a damaged handle, bypass a control, reduce vacuum time, or move garments around a cold or wet area of the table. Better Work compliance reporting has documented damaged ironing components and corrective action involving hose replacement and maintenance. This supports a wider principle: pressing equipment should be safely maintained rather than informally repaired during production.
Use start-of-shift checks for surface cleanliness, steam condition, vacuum response, padding, covers, hoses, controls, and guards. Record breakdowns and stop using unsafe equipment. Preventive maintenance is both a quality system and a worker-protection measure.
Mistake 7: Skipping Vacuum, Cooling, and Relaxation
A garment can appear perfect while warm and damp. If it is moved, stacked, measured, or folded before moisture and heat have dissipated, the shape may relax unevenly, wrinkles may return, and pressure from adjacent pieces may create new marks.
This mistake often comes from measuring only machine cycle time. The finishing department is expected to increase hourly output, so cooling space and hanging time are treated as delays. The factory then pays for the apparent productivity through re-pressing, disputed measurements, and packing defects.
Define when a garment is stable enough to inspect and pack. The method may include a vacuum stage, time on a form, time on a hanger, or a specified relaxation period. Use the same condition for measurement approval. If operators stretch a warm garment into tolerance and measure immediately, the result does not establish stable conformity.
Mistake 8: Using Final Pressing to Hide Sewing or Fusing Problems
Seam puckering, bubbling, twisted panels, roping, stretched necklines, uneven hems, and imbalanced collars may become less visible under heat, pressure, or tension. That does not mean the root cause has been corrected. The defect may return after cooling, care, or wear.
The business risk is larger than a cosmetic reject. Repeated re-pressing consumes labor, increases damage exposure, hides data from the responsible department, and gives buyers an inaccurate view of process capability. A factory can appear to have a finishing problem when its actual constraints are feed control, fusing compatibility, cutting accuracy, or material stability.
- Create routing rules that distinguish:
- a correctable presentation issue suitable for one approved pressing cycle;
- a sewing repair requiring opening or resewing;
- a fusing or bonding fault requiring technical assessment;
- a material or dimensional failure requiring segregation;
- irreversible press damage requiring rejection or authorized disposition.
After the list is established, inspectors need authority to route the garment correctly instead of rewarding any method that makes it look acceptable for a few minutes.
Mistake 9: Approving Appearance Under Poor Inspection Conditions
Diffuse or insufficient light can hide shine, shade change, stains, press-bed impressions, and surface crushing. A flat-table inspection can miss twisted seams, uneven balance, or poor collar stance. Evaluating only the front may overlook back-seat shine, sleeve-board marks, or lining distortion.
The solution is not an elaborate laboratory for every production line. It is a controlled and repeatable inspection setup appropriate to the product: clean neutral surroundings, adequate general light, directional light for reflective defects, an approved sample, and the correct viewing distance and orientation. Critical styles should also be checked on a hanger or form.
Inspection timing matters. Compare immediately after pressing for process damage, then after cooling for stability. For high-risk products, add a pack-recovery review. A defect that appears only after compression is still relevant to the delivered customer experience.
Mistake 10: Folding and Packing Before the Garment Is Ready
Finishing does not end when the garment leaves the iron or press. An unsuitable folding board, narrow polybag, overloaded carton, misplaced tissue, incorrect hanger, or excessive compression can undo the approved appearance. Warm garments are especially vulnerable because folds and pressure are applied before the shape has stabilized.
The sales channel changes the risk. A blazer shipped on a hanger, a wholesale shirt packed in size assortments, and a direct-to-consumer dress compressed into a parcel follow different presentation journeys. The packaging method should preserve the product rather than merely minimize volume.
Run a pack-out trial using production materials and realistic storage or transit conditions. Open the package after the defined period, allow the expected recovery time, and inspect the garment under retail or photography lighting. If extensive steaming is always required at destination, the brand should decide whether that is an accepted channel process or evidence that packaging needs revision.
Mistake 11: Relying on Operator Memory Instead of an Approved Standard
Experienced operators make valuable judgments, but undocumented knowledge creates inconsistency across shifts, factories, and production peaks. One person may press a lapel softly, another sharply, and a third may avoid the area entirely. All can claim that the garment was “properly ironed” because the target was never defined.
A useful work instruction combines a visual reference with critical settings and handling points. It should identify equipment, support, sequence, areas to protect, areas not to press, validated operating window, cooling requirement, appearance criteria, and re-press limit. It must also cover style variations that change risk, including color, print, trim, interlining, and decoration.
The wider process—from pressing through cleaning, final inspection, folding, and packing—is explained in garment pressing and finishing for better product presentation. The important point here is traceability: when an appearance result changes, the team should be able to identify which instruction, setting, material, machine, or operator condition changed with it.
A Practical Prevention System for Fashion Businesses
Preventing finishing defects requires alignment between product development, production, quality, maintenance, and packing. The factory cannot own the entire decision if the brand has never defined the intended appearance. The brand cannot demand consistency if late component substitutions bypass revalidation.
A compact control system can be built around six elements:
- Approve the aesthetic target. Use a sealed sample and written criteria for shape, surface, crease, texture, and fold.
- Validate the complete product. Test production-equivalent materials, colors, interlinings, trims, decorations, and packaging.
- Document the process window. Record equipment, support, sequence, heat, steam or moisture, pressure, time, vacuum, cooling, and re-press limits.
- Separate defect routes. Distinguish finishing correction, sewing repair, fusing review, material failure, and irreversible damage.
- Control the workplace. Maintain equipment, clean surfaces, appropriate lighting, ventilation, safe work methods, and sufficient cooling space.
- Measure stability and flow. Track first-pass acceptance, re-pressing, repair returns, press damage, equipment downtime, and pack-recovery failures.
ILO guidance on garment operations has discussed integrating quality inspection, ironing, folding, and packing more closely with production flow. Its good management practices for apparel factories reinforce the idea that finishing performance depends on workflow and quality ownership, not only operator speed.
What Brands Should Verify Before Bulk Approval
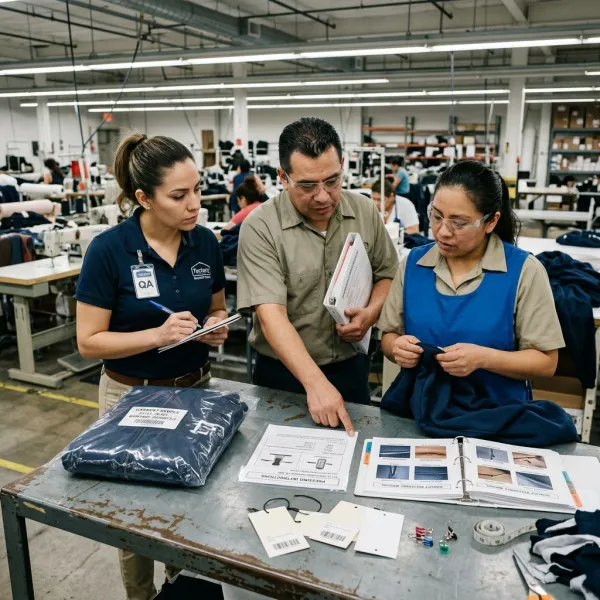
Before authorizing production, verify that the appearance target is technically achievable and commercially appropriate. Ask the following questions:
- Is the approved result defined for the specific product rather than as generic “good ironing”?
- Has the full garment been tested after cooling, relaxation, and pack-out?
- Are every risk-bearing colorway, interlining, trim, print, coating, and decoration covered?
- Can the factory distinguish press damage from sewing, fusing, and material defects?
- Are equipment condition, lighting, cooling space, operator training, and maintenance sufficient at planned volume?
- Do the factory method, care label, quality standard, and packaging specification agree?
- Are re-pressing, spot cleaning, repair, and rejection limits explicit?
Care instructions should be based on a reasonable technical basis for the complete product. For apparel sold in the United States, the Federal Trade Commission states that covered manufacturers and importers must provide regular care instructions and possess a reasonable basis for them; its Care Labeling Rule guidance is one market-specific reference. Brands distributing elsewhere should verify applicable local requirements rather than assuming one label system is universal.
Important Technical Caveats
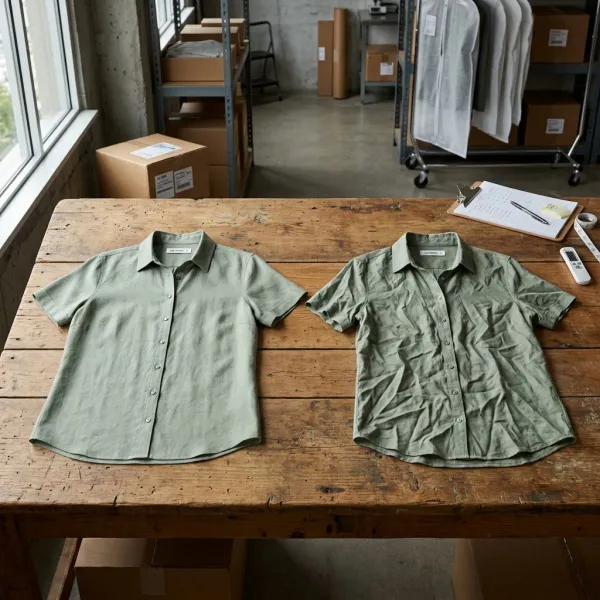
Not every visible irregularity is a defect. Washed linen, crinkle fabric, garment-dyed products, distressed denim, brushed surfaces, and hand-finished items may intentionally retain variation. The standard must distinguish design character from uncontrolled inconsistency.
Not every finishing fault is repairable. Scorching, melting, severe glazing, crushed coatings, delamination, color change, and some pile damage may be irreversible. Repeated attempts can enlarge the loss. Establish stop rules and authorized disposition instead of requiring operators to keep trying.
Finally, a successful final inspection does not prove that the appearance will survive care or wear. Product development should include relevant material, garment, and care testing. Finishing approval assesses the delivered presentation state; it is not a substitute for performance validation.
Frequently Asked Questions
What is the most common cause of inconsistent garment finishing?
There is no single universal cause, but inconsistency commonly appears when the factory lacks a style-specific standard and relies on operator judgment. Machine condition, steam quality, table padding, vacuum strength, garment moisture, support, sequence, cooling time, and material variation can all change the result. Start by comparing approved and rejected units under the same light, then review equipment, settings, components, operators, and timing. A broad defect code such as “bad ironing” will not reveal which variable is unstable. Check this before changing operator performance targets.
Can press shine be removed from a garment?
Sometimes a mild surface change can be reduced through an approved low-contact or steam treatment, but removal is not guaranteed. Shine may result from flattened fibers, altered texture, glazing, contamination, excessive heat, or pressure concentrated over seams and edges. On thermoplastic or permanently damaged surfaces, further treatment may worsen the mark. First compare the area with an unpressed control and identify the cause. Prevention—correct temperature, pressure, dwell, padding, support, press cloth, and technique—is more reliable than attempting repair after bulk production.
Why do wrinkles return after final pressing?
Wrinkles may return because the garment was packed while warm or damp, vacuum was insufficient, the material retained residual stress, or the crease originated in construction or packing rather than simple handling. High humidity, compression, and unstable dimensions can also affect recovery. Inspect after full cooling and relaxation, then repeat the intended packing process. If the same wrinkle consistently reappears at a seam or component, investigate sewing, fusing, material stability, and fold design instead of increasing heat or repeating the same press cycle.
Should loose threads be removed before or after pressing?
Thread control should occur throughout production, with a final pre-press check for loose or protruding ends that could leave impressions, contaminate surfaces, or become harder to remove. Some trimming is necessarily completed after sewing, but leaving all thread removal until after pressing makes inspection less effective and can allow heat to set lint, residue, or thread-related marks. The factory should define which threads are trimmed at the operation, before final pressing, and during final inspection, while avoiding cuts that damage stitches or fabric.
Is re-pressing an acceptable garment repair?
One controlled re-press may be appropriate for a correctable handling wrinkle or incomplete presentation result. Repeated re-pressing without diagnosis is not a reliable repair method. Heat, steam, pressure, and time accumulate, increasing the risk of shine, shrinkage, delamination, distortion, color change, or trim damage. Set a re-press limit and record the reason. If the result does not remain after cooling, route the garment to sewing, fusing, material, or technical review rather than continuing to expose it. Escalation protects both product and operator.
How can a brand judge finishing quality remotely?
Request standardized evidence rather than relying on one flattering photograph. Useful records include front, back, side, and close-up images under diffuse and directional light; measurements taken after cooling; short movement video for drape-sensitive products; pre-press and post-press comparisons; defect references; and pack-recovery images. Ask the supplier to include an approved sample in the frame where practical. Remote review cannot replace all physical inspection because touch, internal construction, odor, moisture, and subtle surface changes may not reproduce accurately on camera. For higher-risk orders, request retained physical samples.
Does a wrinkle-free appearance always look more professional?
No. Professional presentation means consistency with the product’s design intent and market positioning. Formal shirts and tailored trousers may require controlled smoothness and sharp details, while washed linen, crinkled fabric, relaxed knitwear, distressed denim, or softly constructed clothing may look wrong when pressed completely flat. The approval standard should identify intentional texture, acceptable variation, critical smooth areas, and prohibited creases. Customers judge whether the garment looks coherent and deliberate, not whether every surface follows the same level of crispness. Reference images help suppliers preserve that distinction.
Conclusion
Finishing mistakes become expensive when factories treat them as isolated ironing problems. The visible fault may originate in pressing, but it may also reveal weaknesses in material stability, fusing, sewing, handling, inspection, cooling, or packaging. Repeating the final operation without diagnosis hides that distinction.
A more professional result comes from controlled decisions: test the complete product, match support and settings to the style, prepare the garment before pressing, maintain equipment, allow stabilization, inspect under appropriate conditions, and route upstream defects back to their source. Just as importantly, define what the product should look like. Maximum flatness is not a universal quality standard.
When finishing is managed as a connected quality system, it protects the intended shape and surface without disguising faults that customers will discover later. That is the difference between making a garment look acceptable at the factory table and delivering a presentation that remains credible through packing, retail, and use.





Comments 0
Leave a CommentSend Comment
Anda harus Login terlebih dahulu untuk dapat memberikan komentar.