

Common Sleeve Problems and How to Prevent Pulling, Twisting, and Wrinkles
Quick Answer
Sleeve pulling, twisting, and persistent wrinkles usually occur because the sleeve, armhole, shoulder, and upper body are no longer balanced as a system. Common causes include insufficient bicep ease, incorrect sleeve pitch, mismatched armhole and sleeve-cap geometry, unsuitable cap height, incorrect shoulder position, sewing distortion, or inaccurate distribution of sleeve-cap ease.
The direction and behavior of the wrinkle provide clues, but a wrinkle should not be diagnosed from appearance alone. Tight horizontal lines around the upper arm often suggest insufficient width, while persistent diagonal drag lines can indicate sleeve rotation, cap geometry, shoulder imbalance, or insufficient room elsewhere. A sleeve seam that spirals toward the front or back is often a stronger clue of rotational imbalance than a single wrinkle.
The safest troubleshooting sequence is therefore: check the bodice first, observe the sleeve at rest, test movement, inspect grainline and seam position, verify measurements, and only then alter the sleeve pattern.
Not every wrinkle is a defect. Shorter or flatter sleeve caps, relaxed sleeves, and mobility-oriented garments can deliberately produce folds when the arm hangs naturally. Good sleeve fitting is about distinguishing functional ease from unintended strain.
Why Are Sleeve Fit Problems So Difficult to Diagnose?
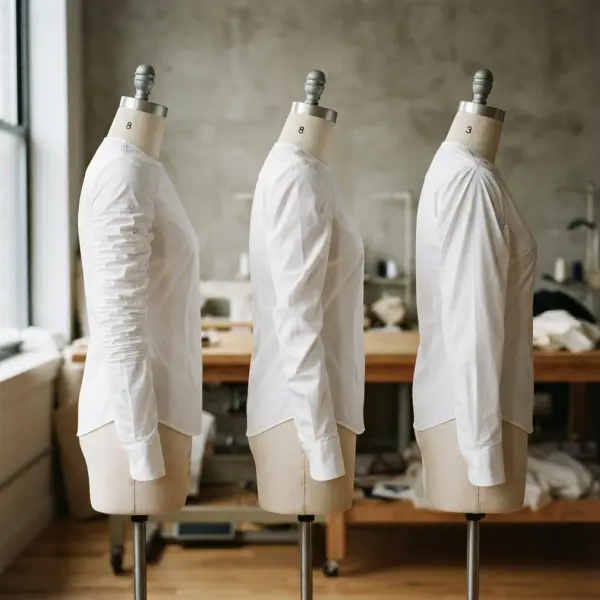
Sleeve problems are difficult because the symptom may appear on the sleeve even when the original cause is somewhere else. The sleeve connects to the bodice at a highly mobile part of the body, so shoulder width, shoulder slope, upper-back fit, chest width, armhole depth, sleeve-cap geometry, bicep width, posture, and arm position can all affect what appears on the fabric.
This makes sleeve fitting different from simply checking whether a circumference measurement is large enough. A sleeve may measure generously around the bicep yet still pull because its orientation does not match the wearer's natural arm position. Conversely, adding more sleeve width may disguise rather than solve a sleeve that has been inserted at the wrong pitch.
Sleeves and armholes are drafted as a related pair. Seamwork notes that factors such as armhole depth, sleeve-cap construction, bicep ease, underarm position, and upper-bodice ease interact when sleeves are developed or replaced. Fashion businesses therefore need to diagnose the complete sleeve-bodice relationship, not simply modify whichever area appears wrinkled.
The foundation for this relationship is covered more fully in how sleeve construction affects garment fit. This article moves one step further: how to interpret visible problems without jumping too quickly to the wrong correction.
Start With the Difference Between Normal Folds and Fit Problems
Not every fold in a sleeve should be removed. Fabric has to move around the shoulder and elbow, and garments that provide useful mobility often contain fabric that forms folds when the body returns to a resting position.
This is especially relevant to casual garments with relatively flat sleeve caps. A flatter cap can allow greater arm movement while producing more diagonal folding when the arm hangs down. Seamwork's patternmaking discussion makes the same distinction: reducing sleeve-cap height can improve upward arm movement but may introduce visible drag lines, whereas a taller cap can appear smoother at rest while limiting movement sooner.
A wrinkle becomes more diagnostically useful when it is:
- persistent in the garment's intended resting position;
- accompanied by tension or discomfort;
- pulling a seam or balance line out of position;
- causing the sleeve to rotate around the arm;
- repeated consistently across samples;
- or inconsistent with the intended silhouette.
A fashion T-shirt, relaxed overshirt, fitted woven blouse, tailored jacket, and performance uniform therefore should not share exactly the same wrinkle standard. The construction differences among set-in, raglan, and dolman sleeves also change what visual behavior is reasonable.
How Should Sleeve Wrinkles Be Read?
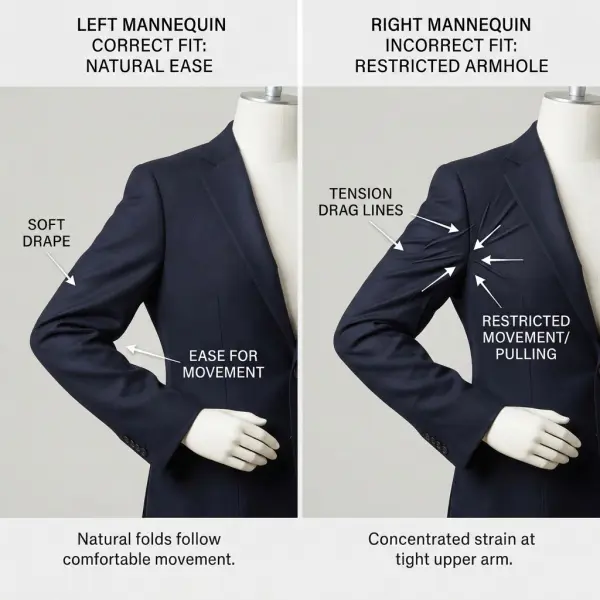
Wrinkles can be treated as evidence of how fabric is being displaced, but they are not a perfect one-to-one code. Their direction, tightness, location, seam behavior, garment balance, and movement all need to be interpreted together.
A useful first distinction is between tension wrinkles and loose folds. Tight lines usually indicate fabric being pulled between points of resistance, whereas loose folds may indicate excess length, excess width, insufficient support, or intentional ease. Seamwork's fitting guidance similarly distinguishes tight strain wrinkles from looser excess-fabric wrinkles and emphasizes reading the direction in which the distortion points.
For sleeves, four observations are particularly useful:
|
Symptom |
Possible interpretation |
What to verify before altering |
|
Horizontal strain across upper arm |
Sleeve may be too narrow at bicep |
Finished bicep circumference, fabric stretch, bodice restriction |
|
Diagonal lines from sleeve cap toward underarm |
Cap geometry, insufficient width, sleeve pitch, or shoulder relationship may be involved |
Grainline, bicep width, cap height, shoulder fit |
|
Sleeve seam spirals forward or backward |
Sleeve may be rotationally misaligned |
Sleeve pitch, notch position, arm posture |
|
Puckering around armhole seam |
Sewing/easing problem or excessive cap ease may be involved |
Cap-to-armhole seam length, ease distribution, pressing, operator handling |
|
Sleeve lifts bodice strongly when arm rises |
Armhole/cap relationship may limit movement |
Armhole depth, cap height, sleeve type, bodice ease |
|
Excess loose fabric under arm |
May be intentional or related to low armhole/low cap geometry |
Garment design, armhole depth, silhouette |
These should be treated as diagnostic starting points rather than automatic pattern corrections. Similar-looking lines can be produced by different causes.
Problem 1: The Sleeve Feels Tight Around the Upper Arm
A sleeve that strains horizontally across the bicep often lacks sufficient usable circumference for the wearer and fabric. The symptom can include horizontal tension lines, restriction when bending or lifting the arm, distortion of the sleeve seam, or the fabric gripping the upper arm instead of hanging naturally.
The University of Kentucky's sleeve-fitting guidance identifies sufficient upper-arm ease as a basic condition for a conventional set-in sleeve, alongside an armhole that does not bind and enough room for the arm to move freely.
The obvious correction is to increase bicep width, but that should not be the first action in every case. Product developers should first check the finished sleeve circumference against the body measurement, then consider how much stretch or mechanical give the fabric provides. A stretch knit and a crisp woven fabric can have the same nominal measurement while producing very different comfort.
The bodice should also be tested without immediately blaming the sleeve. Insufficient width across the chest or upper back, an incorrectly positioned shoulder, or an armhole that binds can transfer tension into the sleeve as the wearer moves.
What to check
- Measure the wearer's upper arm at the level corresponding to the pattern's bicep line.
- Measure the finished sleeve at that same level, excluding seam allowances.
- Confirm whether the fabric stretches and, more importantly, whether it recovers.
- Observe the sleeve with the arm relaxed and during normal forward and upward movement.
- Check whether the bodice becomes tight across the chest or back at the same time.
If the sleeve itself is genuinely too narrow, width can be added through an appropriate pattern adjustment while preserving the sleeve-cap relationship as carefully as possible. The exact alteration method depends on whether the priority is increasing bicep circumference, preserving cap length, changing cap height, or modifying several variables together.
Problem 2: Diagonal Wrinkles Run From the Sleeve Cap Toward the Underarm
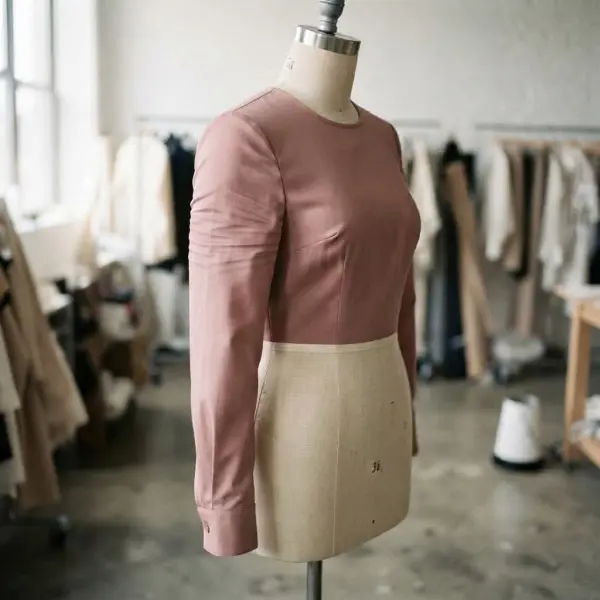
Diagonal drag lines are among the easiest sleeve symptoms to misdiagnose because several pattern relationships can create them. Insufficient bicep room is one possible cause, but sleeve-cap height, armhole geometry, shoulder position, and sleeve pitch can also influence similar-looking lines.
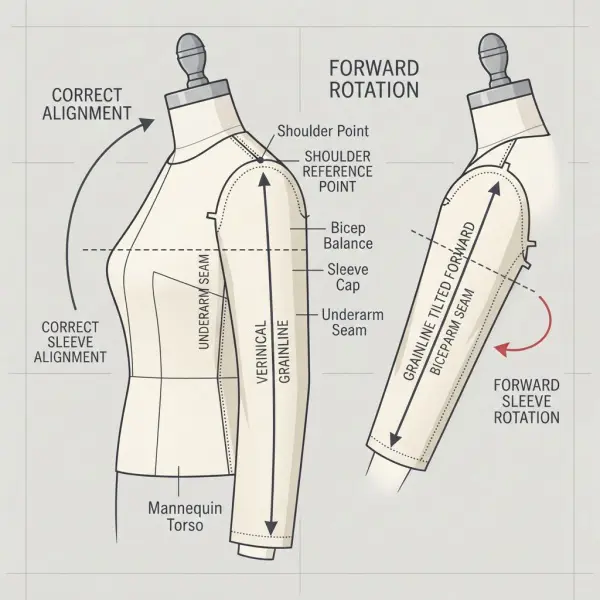
This is why the direction of the wrinkles should be combined with balance-line information. On a fitted sleeve, the sleeve's lengthwise grain and bicep line can help reveal whether the fabric is hanging as intended. If the sleeve grain rotates or the bicep line tilts significantly, simply adding circumference may not address the underlying geometry.
Cap height also creates a trade-off. A relatively low cap can provide greater mobility but can produce more diagonal folds when the arm hangs naturally. A higher fitted cap may reduce those lines at rest while restricting arm lift earlier. Seamwork explicitly warns that changing cap height affects both drag lines and range of motion.
The diagnostic question should therefore be: Are the lines evidence of strain, evidence of orientation, or simply the expected behavior of this sleeve geometry?
If the garment is comfortable, the folds are symmetrical, and the sleeve was intentionally drafted with a flatter cap for mobility, removing every diagonal line could make the garment perform worse. If the lines are tight, directional, asymmetric, or accompanied by restricted movement, a correction is more likely to be necessary.
Problem 3: The Sleeve Twists Toward the Front or Back
A twisting sleeve is frequently a balance problem rather than a circumference problem. In a correctly oriented conventional sleeve, the pattern is designed to hang at a specific rotational position relative to the shoulder and arm. If the sleeve is rotated during sewing or the pattern's sleeve pitch does not correspond reasonably well with the wearer's arm posture, the fabric can spiral around the arm.
Sleeve pitch describes this rotational relationship. Human arms do not necessarily hang exactly at the side in a perfectly vertical plane; many people naturally carry their arms somewhat forward. Garment blocks also embody assumptions about posture. When the pattern and body differ substantially, the sleeve may seek a different position.
Forward-shoulder differences can add another layer. Closet Core's bodice-fitting guidance notes that forward-shoulder posture can affect armhole and sleeve behavior and may require shifting the sleeve's corresponding reference position after the shoulder relationship is corrected.
A practical test for sleeve rotation
Before redrafting the sleeve, temporarily remove or partially release the sleeve from the armhole and allow it to rotate until it hangs more naturally. If the wrinkles reduce and the sleeve seam sits more appropriately when rotated, pitch or insertion position deserves investigation.
For production teams, first verify that:
- front and back sleeve notches have not been reversed;
- the sleeve has not been inserted into the wrong armhole;
- paired sleeves were cut correctly rather than as two identical unmirrored pieces;
- the shoulder reference point aligns with the intended sleeve point;
- the factory has not shifted sleeve ease during sewing;
- the fabric has not been distorted during pressing or handling.
A pattern correction should come only after assembly errors have been excluded.
Problem 4: The Sleeve Cap Looks Puckered After Sewing
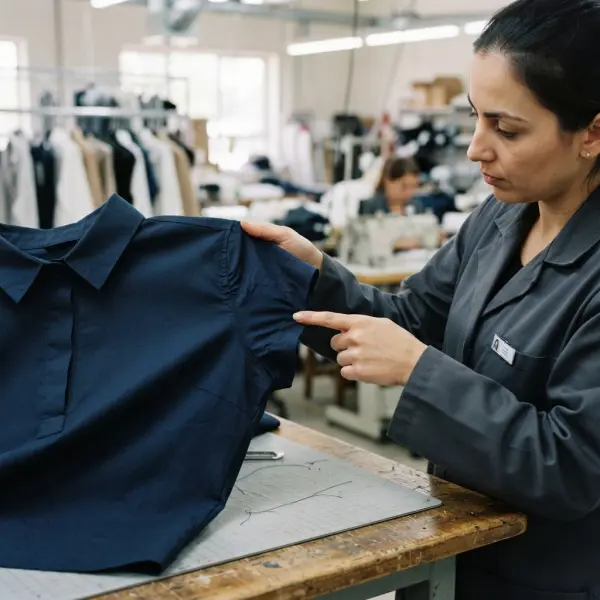
Puckering around a conventional set-in sleeve cap is often a construction issue, although pattern geometry can contribute. The distinction matters commercially because changing the pattern will not solve inconsistent operator handling, while retraining an operator will not solve excessive cap-to-armhole mismatch.
Many fitted woven set-in sleeves contain extra sleeve-cap seam length that is intentionally eased into the armhole. The objective is to distribute that fullness without visible gathers. New Mexico State University specifically describes matching sleeve notches and reference points, distributing ease, shaping the sleeve cap, and sewing it into the armscye so that the finished cap appears smooth.
Puckers can appear when cap ease is distributed unevenly, when the sleeve and armhole are inaccurately cut, when seam allowances stretch during handling, or when the fabric cannot accommodate the intended shaping gracefully. Stitch tension, feed behavior, seam allowance control, and pressing also matter.
NMSU's clothing-construction standards describe a well-constructed set-in sleeve as having evenly distributed fullness and a smooth, even cap seam.
For a recurring production defect, compare the actual cut components against the approved pattern before modifying anything. If the first sample was smooth but production pieces pucker inconsistently, sewing or cutting variation may be more likely than a fundamental pattern problem.
Problem 5: The Sleeve Looks Fine at Rest but Restricts Arm Movement
A sleeve can look exceptionally clean while the wearer stands still and still perform poorly when the arm moves. This commonly happens when the combined sleeve-cap and armhole geometry prioritizes a close static fit over mobility.
Armhole depth is particularly important. A low armhole may appear roomy because the opening itself is large, but it can cause more of the garment body to move when the arm lifts. Conversely, a well-fitted higher armhole can sometimes follow the body's motion more efficiently, provided that the armhole does not bind and the sleeve provides adequate circumference.
Cap geometry contributes to the same trade-off. Seamwork notes that a shorter sleeve cap can allow more upward movement, whereas a taller cap generally gives a smoother appearance but reaches its movement limit earlier.
This is why fit approval should include more than a front photograph. Depending on the garment's intended use, the wearer can:
- stand naturally with arms relaxed;
- move both arms forward;
- bend the elbows;
- reach outward;
- lift an arm to a position appropriate for the product;
- return to the neutral position.
The goal is not to prevent the garment from moving entirely. Some body lift is normal. The relevant question is whether restriction or displacement is excessive for the product category.
A formal blouse and a work uniform can legitimately have different movement thresholds.
Problem 6: The Bodice Pulls Up When the Arm Is Raised
When the wearer lifts an arm and much of the bodice follows upward, the problem may involve the relationship between sleeve angle, sleeve-cap height, and armhole depth rather than simply insufficient sleeve width.
The mechanism is easier to understand geometrically. A sleeve drafted to hang downward cleanly needs fabric to change direction as the arm rises. If the pattern provides limited ability for that change, the moving arm pulls the sleeve and attached bodice with it.
Relaxed sleeves with flatter caps often tolerate upward movement differently because more material exists around the underarm when the arm rests. That same material can appear as folds. Eliminating it for the sake of a perfectly smooth static appearance may therefore reduce mobility.
Before altering the sleeve, development teams should compare the desired function with the original design intention. A highly tailored formal garment may reasonably prioritize clean vertical hang more than an active uniform. A mobility-oriented product may justify additional underarm ease, modified cap geometry, stretch material, or another construction solution.
The important commercial lesson is that static appearance and dynamic performance need to be specified separately.
Problem 7: The Armhole Feels Tight Even When the Sleeve Is Wide Enough
A large sleeve does not compensate for an incorrectly fitted armhole. The armhole itself can bind because it is too small in the wrong area, incorrectly shaped for the shoulder, or positioned poorly relative to the body.
The University of Kentucky identifies both adequate sleeve ease and an armhole large enough not to bind as separate conditions of proper sleeve fit. This distinction is useful because teams sometimes increase bicep circumference repeatedly while the real restriction remains at the bodice.
Shoulder width and shoulder slope should also be checked. If the shoulder seam extends too far beyond the anatomical shoulder or ends too far inward, the armhole can shift away from the location assumed by the sleeve pattern. The same can happen when the wearer's shoulder slope differs from the block.
The correction therefore begins with the bodice. Fit the neckline, upper chest/back, shoulder width, shoulder slope, and armhole position before investing heavily in sleeve refinements. Otherwise, a sleeve may be fitted perfectly to the wrong armhole.
Problem 8: There Is Excess Fabric Under the Arm
Loose fabric beneath the arm can have several meanings. In a deep dolman, low-cap casual sleeve, or oversized silhouette, it may simply be part of the design. In a closely fitted set-in sleeve, however, excessive underarm fabric can indicate inappropriate armhole depth, sleeve-cap geometry, excess circumference, or another balance problem.
This is where context prevents overcorrection. NMSU notes that the slope and width of cut-on sleeve constructions influence both fit and ease of movement. A fold under a dolman sleeve should therefore not be judged according to the same criteria used for a tailored jacket sleeve.
For set-in products, inspect the armhole position first. A very low underarm can create additional fabric when the arm is lowered and can also increase garment lift when the arm rises.
If the garment was intentionally designed with a low armhole, that appearance may be correct. The technical team should only call it a defect if it conflicts with the approved silhouette or performance requirement.
Problem 9: One Sleeve Behaves Differently From the Other
Asymmetry is a valuable diagnostic clue. If only one sleeve twists, puckers, pulls, or hangs incorrectly while the other looks acceptable, production and body asymmetry should be investigated before changing the master pattern.
Human bodies are rarely perfectly symmetrical. One shoulder may sit higher, one arm may rotate differently, or posture may differ between sides. Fit models can therefore produce legitimate left-right differences.
But manufacturing variation is also possible. Check whether:
- the sleeves were cut as a correctly mirrored pair;
- both sleeve pieces came from the same pattern revision;
- notches were marked accurately;
- seam allowances match;
- one armhole was stretched during construction;
- one sleeve received different ease distribution;
- print, grain, or fabric distortion differs between sides.
If several garments repeatedly show the problem on the same production side regardless of wearer, an assembly process deserves investigation. If the issue appears only on one wearer, body asymmetry may be the stronger explanation.
Sleeve Pitch, Grainline, and Balance Lines: Three Useful Diagnostic Tools
Sleeve fitting becomes easier when teams observe reference lines rather than relying only on general visual judgment. Grainline, bicep balance, and seam position help show whether the pattern is hanging where it was intended.
In a conventional fitted sleeve, the lengthwise grain generally provides a reference through the sleeve. If it visibly rotates around the arm, the sleeve may be seeking a different pitch. The horizontal bicep line can also help indicate whether cap geometry or orientation is causing the sleeve to tilt.
These are diagnostic tools rather than absolute rules for every style. Oversized, draped, twisted-seam, bias-cut, or deliberately sculptural sleeves may intentionally depart from conventional balance.
For fit samples, temporary horizontal and vertical balance lines can be marked directly on a toile or muslin. When the wearer moves, the development team can see whether distortion starts from the sleeve, bodice, or shoulder rather than trying to interpret an unmarked surface.
Pattern Problem or Sewing Problem? Diagnose Before Correcting
One of the costliest product-development mistakes is altering a correct pattern to compensate for poor sewing. Once that altered pattern goes into production, the original construction variation may remain and the garment can become even less consistent.
A useful diagnostic sequence separates three categories.
1. Pattern and fit problems
These tend to reproduce consistently across samples made correctly from the same pattern. Examples can include inadequate bicep width, inappropriate cap geometry, incorrect sleeve pitch, unsuitable armhole position, or a shoulder relationship that does not match the fit target.
2. Cutting and sewing problems
These may vary from garment to garment. Incorrect notches, mismatched seam lengths caused by inaccurate cutting, stretching of the armhole, irregular easing, reversed sleeves, differential feeding, and inconsistent seam allowances can produce sleeve symptoms even when the approved pattern is sound.
3. Pressing and finishing problems
Pressing can shape a curved sleeve cap, but poor pressing can also distort seams, flatten intentional shaping, create shine, or leave puckering visible. NMSU's construction standards specifically include appropriate seam pressing and smooth sleeve-cap construction among garment-quality criteria.
The distinction becomes particularly important in bulk production. If an approved pre-production sample has correct sleeve balance but random production units twist or pucker, immediately redrafting the master pattern would be difficult to justify without further evidence.
A Better Troubleshooting Sequence for Fashion Brands and Factories
Sleeve fitting is easier when corrections are made in a disciplined order. Changing several variables simultaneously may produce a better sample while making it impossible to identify which change actually solved the problem.
A practical sequence is:
- Confirm design intent. Decide how fitted, smooth, mobile, or relaxed the sleeve is supposed to be.
- Fit the bodice first. Check shoulder width, shoulder slope, chest, upper back, and armhole position.
- Check sleeve circumference. Compare body measurements with finished bicep and lower-sleeve dimensions.
- Observe balance. Examine grainline, sleeve seam, notches, and rotational position.
- Test movement. Evaluate forward reach, elbow bend, outward movement, and appropriate arm lift.
- Inspect construction. Confirm cutting accuracy, notch alignment, ease distribution, seam allowance, feed, and pressing.
- Alter one variable at a time. Record each pattern revision and the effect it produces.
- Retest in the intended production fabric. Toile fabric and bulk fabric can behave differently.
- Validate selected graded sizes. Do not assume the correction scales perfectly across the range.
- This workflow also improves communication with factories. "Sleeve twists approximately toward the front while the bicep circumference is within specification; verify notch alignment and sleeve pitch" is far more actionable than "fix sleeve wrinkles."
Why Fabric Can Turn a Minor Sleeve Issue Into a Visible Defect
Fabric properties influence how clearly a sleeve problem appears. A soft, fluid material may redistribute some excess fabric into gentle folds, while a crisp fabric can make the same imbalance much more visible. Thick materials can amplify seam bulk, and highly elastic fabrics may hide circumference problems until recovery deteriorates or the wearer moves.
Stretch itself should not be treated as a universal solution. The direction and percentage of stretch, recovery, garment fit, seam construction, and stability around the armhole all influence how the product behaves.
Fabric substitution therefore deserves renewed sleeve testing. A pattern approved in one woven fabric may not produce the same cap shaping in another with different compressibility, thickness, or drape. Even fabrics described under the same generic fiber name can behave differently because weave, knit structure, yarn, weight, and finishing vary.
For sourcing teams, the operational rule is straightforward: fit approval belongs to the pattern-and-fabric combination, not to the pattern in isolation.
Common Mistakes When Correcting Sleeve Fit
Adding Width to Every Sleeve That Shows Wrinkles
Width is appropriate when evidence shows insufficient circumference, but not all wrinkles mean tightness. A rotated sleeve can remain twisted after width is added, while a low-cap mobility sleeve can develop intentional folds that additional circumference only exaggerates.
Before increasing width, teams should check tension, grain orientation, seam rotation, and bodice balance. A correction should target the mechanism producing the problem, not simply make the garment larger.
Fixing the Sleeve Before the Shoulder and Bodice
The shoulder is an important anchor for the armhole. If its width, slope, or position is wrong, the sleeve is being asked to fit an armhole that is already displaced.
Closet Core's fitting guidance demonstrates how shoulder differences can generate armhole distortion and can affect the corresponding sleeve position. The practical sequence should therefore be bodice first, sleeve second.
Eliminating Every Diagonal Fold
This can reduce mobility. Flatter caps and casual sleeves may form diagonal folds when the wearer's arm is lowered because fabric has been allocated for movement.
Seamwork's patternmaking guidance explicitly describes the trade-off between shorter cap height, drag lines, and increased range of motion. A development team that evaluates only static imagery may unintentionally engineer mobility out of the garment.
Changing Several Pattern Variables at the Same Time
Increasing bicep width, raising the cap, rotating the sleeve, and modifying the armhole in one revision might produce a better garment, but the team will not know why. That makes future troubleshooting difficult and can introduce hidden problems into grading.
Controlled development is slower per revision but usually more informative. One primary hypothesis should be tested at a time whenever practical.
Treating a Production Defect as a Pattern Defect
If one sleeve puckers while nine others made from the same pattern do not, the pattern is unlikely to be the only variable involved. Cutting, sewing, operator handling, feed, thread tension, pressing, and fabric variation need to be investigated.
Repeatedly modifying the pattern to compensate for unstable production can make a previously correct fit progressively worse.
What Should Be Included in Sleeve Quality Control?
Sleeve quality control should combine measurable specifications with visual and functional checks. Circumference and sleeve length alone cannot identify rotation, inappropriate easing, or movement restriction.
For an appropriate set-in garment, a useful inspection may include:
- correct sleeve attached to the correct side;
- accurate notch and shoulder-point alignment;
- intended sleeve length and opening measurement;
- bicep circumference within tolerance;
- no unintended gathers or puckering at the cap;
- consistent armhole seam allowance and stitching;
- sleeve seam hanging in the intended position;
- left-right symmetry where design and body evaluation permit;
- acceptable movement for the product category;
- pressing consistent with the approved sample.
NMSU's construction guidance similarly emphasizes smooth sleeve seams, evenly distributed fullness in set-in sleeves, suitable stitching, and correct pressing as construction-quality characteristics.
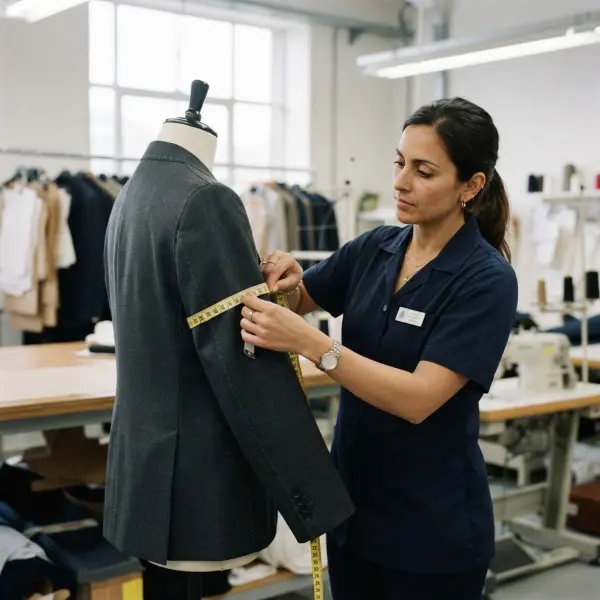
For commercial production, photographs of the approved sleeve in neutral and movement positions can complement numerical specifications. This gives factories and quality-control personnel a visual reference for acceptable drape rather than asking them to interpret broad language such as "no wrinkles."
Important Technical Caveats
Sleeve wrinkles should not be diagnosed from a single photograph whenever a consequential pattern change is being considered. Camera angle, arm position, styling, fabric handling, and temporary folds can all affect what appears in an image.
There is also no universal numerical amount of bicep ease, sleeve-cap ease, or cap height appropriate for every garment. Fabric stretch, product category, design intent, armhole geometry, size range, and the wearer's expected activity change the appropriate relationship.
Body posture further complicates standardization. Forward shoulders, uneven shoulders, arm rotation, muscular development, and asymmetry can cause a standard block to hang differently on different wearers. A fit correction made specifically for one individual may not be appropriate for a ready-to-wear population.
Finally, some sleeve problems are trade-offs rather than errors. A close, smooth sleeve can sacrifice some arm elevation; a more mobile sleeve may show additional folds. Product developers need to decide which behavior is appropriate for the garment rather than trying to optimize every visual and functional variable simultaneously.
How Can Fashion Businesses Prevent Sleeve Problems Before Production?
Prevention begins before the first sleeve is sewn. The design team should establish the intended shoulder line, fit level, armhole position, movement requirement, and fabric behavior before finalizing the sleeve pattern.
Sampling should then preserve those decisions through documented measurements and balance points. Sleeve notches, grainlines, cap references, bicep measurements, and relevant construction notes should remain consistent between pattern versions.
Movement testing should be included before approval, particularly for uniforms, workwear, fitted woven garments, outerwear, and products whose customers are likely to reach or lift their arms frequently. The movement requirement does not need to be theatrical; it simply needs to reflect actual use.
Factories also benefit from knowing which visual characteristics are deliberate. If a relaxed low-cap sleeve is supposed to contain some underarm folding, that should be visible in the approved sample rather than left for individual quality inspectors to interpret.
Finally, corrections should be documented. A simple record stating the symptom, hypothesis, alteration, sample result, and approved revision can prevent teams from repeating the same unsuccessful adjustment during future product development.
Frequently Asked Questions About Sleeve Problems
Why does my sleeve twist even though it is not tight?
Twisting can occur when the sleeve's rotational position does not correspond with the arm or when the sleeve has been inserted incorrectly. The underarm seam may spiral forward or backward, while diagonal lines appear even though the wearer has adequate circumference. Check notch alignment, shoulder reference points, sleeve pitch, grainline, and whether the sleeves were cut as a mirrored pair before adding width. Shoulder posture can also affect the required orientation. If temporarily rotating the sleeve in the armhole improves its hang, pitch or insertion position deserves closer investigation rather than a simple circumference adjustment.
Do horizontal wrinkles always mean the sleeve is too tight?
No. Tight horizontal strain lines across the bicep commonly suggest insufficient usable width, but wrinkle diagnosis should include movement, fabric properties, and bodice fit. If the fabric visibly strains and the wearer feels restriction, bicep circumference is a strong candidate. If the sleeve has adequate width but the armhole binds or the shoulder is incorrectly positioned, the sleeve can still show tension. The University of Kentucky treats upper-arm ease and non-binding armhole fit as separate requirements, which is why both should be checked before altering the pattern.
Why do sleeves have diagonal wrinkles when my arms are down?
Diagonal folds can be normal in sleeves designed with flatter or shorter caps because that geometry can provide more freedom when the arm rises. They become more concerning when the lines are tight, strongly asymmetric, accompanied by rotation, or associated with discomfort. Cap height is only one possible cause; bicep width, sleeve pitch, shoulder geometry, and armhole position can produce similar symptoms. Seamwork specifically notes the trade-off between flatter cap geometry, visible drag lines, and greater arm movement. The correct question is therefore whether the folds match the intended construction and mobility.
Why does a sleeve pucker at the shoulder after it is sewn in?
A fitted set-in sleeve may contain sleeve-cap ease that needs to be distributed smoothly into the armhole. Puckering can result from uneven easing, inaccurate cutting, mismatched seam length, fabric distortion, stitch/feed problems, unsuitable pressing, or simply more cap fullness than the fabric can accommodate cleanly. NMSU describes controlled easing and accurate notch matching as part of sleeve insertion and specifies a smooth finished cap without visible gathering for a plain set-in sleeve. If puckering varies between otherwise identical garments, investigate the sewing process before modifying the master pattern.
Can a sleeve be comfortable even when it has visible wrinkles?
Yes. Comfort and wrinkle-free appearance are not identical goals. Some relaxed or mobility-oriented sleeves intentionally carry additional fabric or use flatter caps, producing folds when the arm hangs naturally. Removing those folds can reduce movement. The garment should instead be judged against its intended silhouette, fabric, product category, and range of motion. Tight wrinkles accompanied by strain deserve investigation; soft folds that appear consistently in the approved design may be perfectly acceptable. This distinction is especially important when comparing tailored garments with T-shirts, oversized tops, workwear, or other casual constructions.
Should sleeve fit be corrected before or after bodice fit?
The bodice should normally be stabilized first because shoulder width, shoulder slope, chest/back fit, and armhole position determine the structure into which the sleeve is inserted. Correcting a sleeve against a poorly fitted bodice risks creating a sleeve that fits the wrong armhole. Once the upper bodice and shoulder are appropriate, the sleeve can be evaluated for bicep ease, cap geometry, pitch, length, and movement. This sequencing is particularly useful when diagonal wrinkles appear near the armhole because their source may lie in the shoulder or upper torso rather than in the sleeve itself.
How can a brand tell whether a sleeve problem is caused by the factory or the pattern?
Look for consistency. A pattern-related issue generally reproduces when several samples are cut and sewn accurately from the same specification, whereas construction problems may vary between garments, operators, or production runs. Compare suspect units with the approved sample and verify pattern version, cut dimensions, notches, seam allowances, cap ease distribution, stitch quality, pressing, and sleeve orientation. If the approved sample and correctly constructed control sample show the same defect, pattern revision becomes more plausible. If the defect appears inconsistently, production variation should be investigated before the master pattern is changed.
Conclusion
Sleeve pulling, twisting, and wrinkles are most useful when treated as diagnostic evidence rather than defects to erase automatically. Their location and direction can point toward insufficient width, sleeve rotation, cap geometry, armhole balance, shoulder fit, or production variation, but rarely should one visual symptom trigger an immediate pattern change by itself.
The most reliable process begins with design intent and bodice fit. From there, developers can evaluate bicep room, sleeve pitch, grainline, cap-to-armhole relationship, movement, sewing accuracy, and fabric behavior in a controlled sequence.
That approach also prevents two expensive mistakes: correcting the pattern for a sewing problem and sacrificing useful mobility in pursuit of a perfectly wrinkle-free photograph.
For brands and manufacturers, successful sleeve fitting is ultimately a balance among appearance, comfort, movement, repeatability, and the intended garment silhouette. When those priorities are explicit, pulling and twisting become easier to troubleshoot—and acceptable folds become easier to distinguish from genuine construction defects.





Comments 0
Leave a CommentSend Comment
Anda harus Login terlebih dahulu untuk dapat memberikan komentar.